On this page:
How to add an artwork location
How to add artwork costs/pricing
How to add an artwork location
Adding an artwork location tells your decorator where the artwork needs to appear on your product.
To add artwork details to an estimate, you can either:
- Add a new artwork location to a product
- Copy the artwork from another product in the same order
- Drag and drop artwork details between different artwork locations
To add a new decoration location to a product:
- Hover your mouse over a product to click edit
- Indicate whether a third party decorator is decorating the item (optional) or leave it as the supplier
- Click + Decoration Location
- Click Add new decoration location
- Enter the location (where the artwork appears) for the decoration into the "Location" text field
To copy a decoration location from another product:
- Hover your mouse over a product to click edit
- Indicate whether a third party decorator is decorating the item (optional) or leave it as the supplier
- Click + add Decoration Location
- Click Copy from another product on this order
- Select the product you want to copy decoration details from
- Click either Copy Artwork Only, or Copy Artwork & Pricing
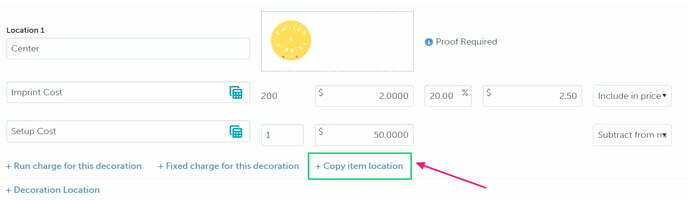
You can copy an artwork location you already created on a product if your product requires multiple artwork locations, but all of your costs are the same.
To do this, click + Copy item location under the artwork location you want to copy.
To use the drag and drop feature to copy artwork details from one decoration location to another:
- Click the Artwork tab
- Click and drag a completed artwork location into a blank location for the same product, or another product on the form
This action copies the art file, as well as the artwork details. Any pricing entered on the first decoration location will not pull over to the second location. You will need to enter those costs manually.
You can add as many artwork locations to a product as you need.
How to add artwork details
To add your artwork details:
- Click Add Artwork
- Select the imprint type for the decoration (how the decoration will be applied)
- Select a proofing option
- Enter a logo name
- Enter a logo size
- Enter a logo color
- Indicate whether the artwork is a repeat logo (optional)
- Leave the decorator a note (optional)
- Click Select Image and upload the artwork by
- clicking Project Files > select the file
- clicking Client Files > filter through the folders (optional) > select the file
- clicking Upload > select the file by dragging and dropping or click within the blue lines to load from your computer > click Done > select the newly uploaded file from the Project Files > click Save
For newly uploaded files, click Add to client files to save to the client page's file for future use.
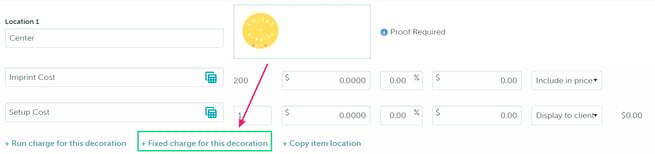
How to add artwork costs/pricing
Each artwork location comes with two cost fields:
These charges are not mandatory and can be deleted by hovering over each line and clicking the x. You can also rename charges by clicking the text field and entering the new name for the cost.
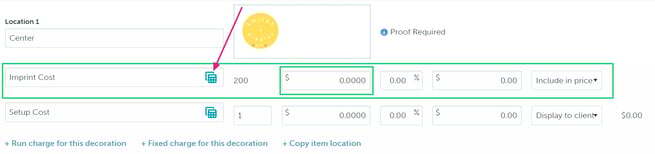
Imprint Cost
To add an imprint cost:
- Click into the "Cost" field and add your cost (what you pay the supplier), or click the Decoration Matrix icon to pull costs from a matrix
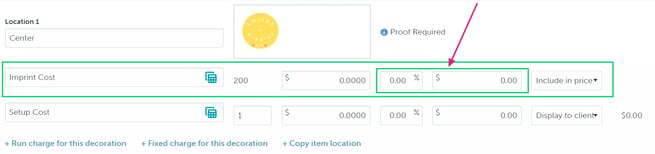
- Enter a margin in the "Margin" field or a price to the "Retail" field
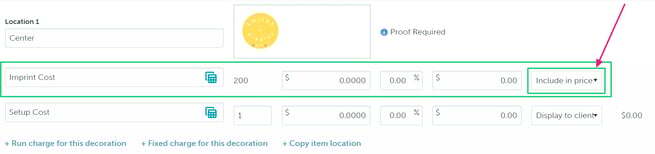
- Select to Include in price (includes the cost in your client's price) or Display to client (displays the price as a separate line item on the estimate)
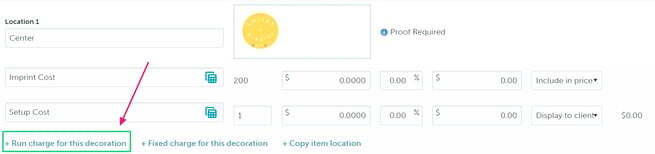
- Add more costs by clicking + add run charge for this decoration and selecting the artwork location the cost is related to (optional)
If you prefer to offer all-inclusive pricing and don't want the imprint cost to affect the product's retail price, enter $0 in the "Retail" field.
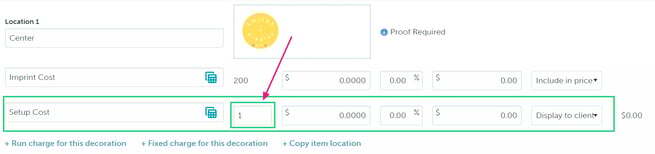
Setup Cost
To add a setup cost:
- Enter the quantity of the charge into the QTY field (this is usually "1")
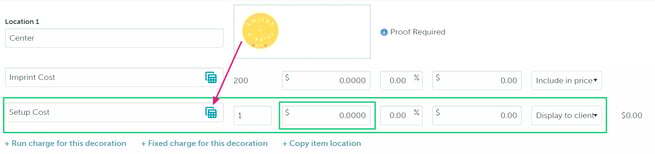
- Click into the "Cost" field and add your cost (what you pay the supplier), or click the Decoration Matrix icon to pull costs from a matrix
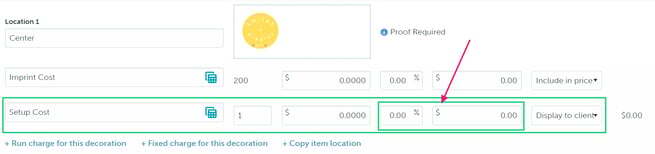
- Enter a margin in the "Margin" field or a price to the "Retail" field
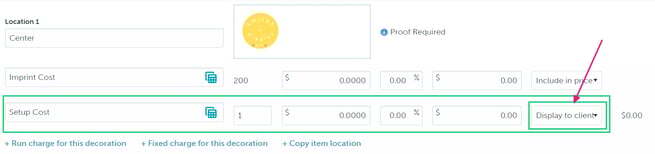
- Select to Display to client (displays the price as a separate line item on the estimate) or Subtract from margin (subtracts the cost from the product's margin)
- Add more costs by clicking + add fixed charge for this decoration and selecting the artwork location the cost is related to (optional)
Selecting to subtract a setup cost from the margin will reduce the product's margin, but you can compensate for the loss by increasing the product's retail price.
FAQ
- Can the client see the artwork I attached to the product?
- Where does my artwork go when I convert the estimate?
- Can I upload artwork directly to the product?
- How do I add multiple images/files to a single artwork location?
- What's the best practice to include artwork costs in my client's price?
- Is there a character limit for a run/fixed charge's name?
Can the client see the artwork I attached to the product?
Yes! The artwork details are displayed below each product on the estimate.
Where does my artwork go when I convert my estimate?
The artwork details and pricing pass over when you convert the estimate to a sales order.
Can I upload artwork directly to the product?
The artwork location doesn't create virtuals; it's used to pass information over to the sales order and eventually to the supplier's purchase order.
How do I add multiple images/files to a single artwork location?
You can add multiple files to a single location by clicking the empty space beside the existing artwork file. Uploading multiple files is common anytime you need to add a proof beside the artwork file, especially with repeat logos.

What's the best practice to include the artwork costs in my client's price?
The best practice is to:
- Edit the product's size, color, quantity breaks, and net cost
- Add the artwork locations and select to include all imprint costs in the price and subtract all setup costs from the margin
- Adjust the product's retail price(s) until the product's margin (shown in the bottom right corner) matches what you'd like to make on the product
Is there a character limit for a run/fixed charge's name?
Each charge name can have up to 255 characters, including spaces.