On this page:
How to email an invoice
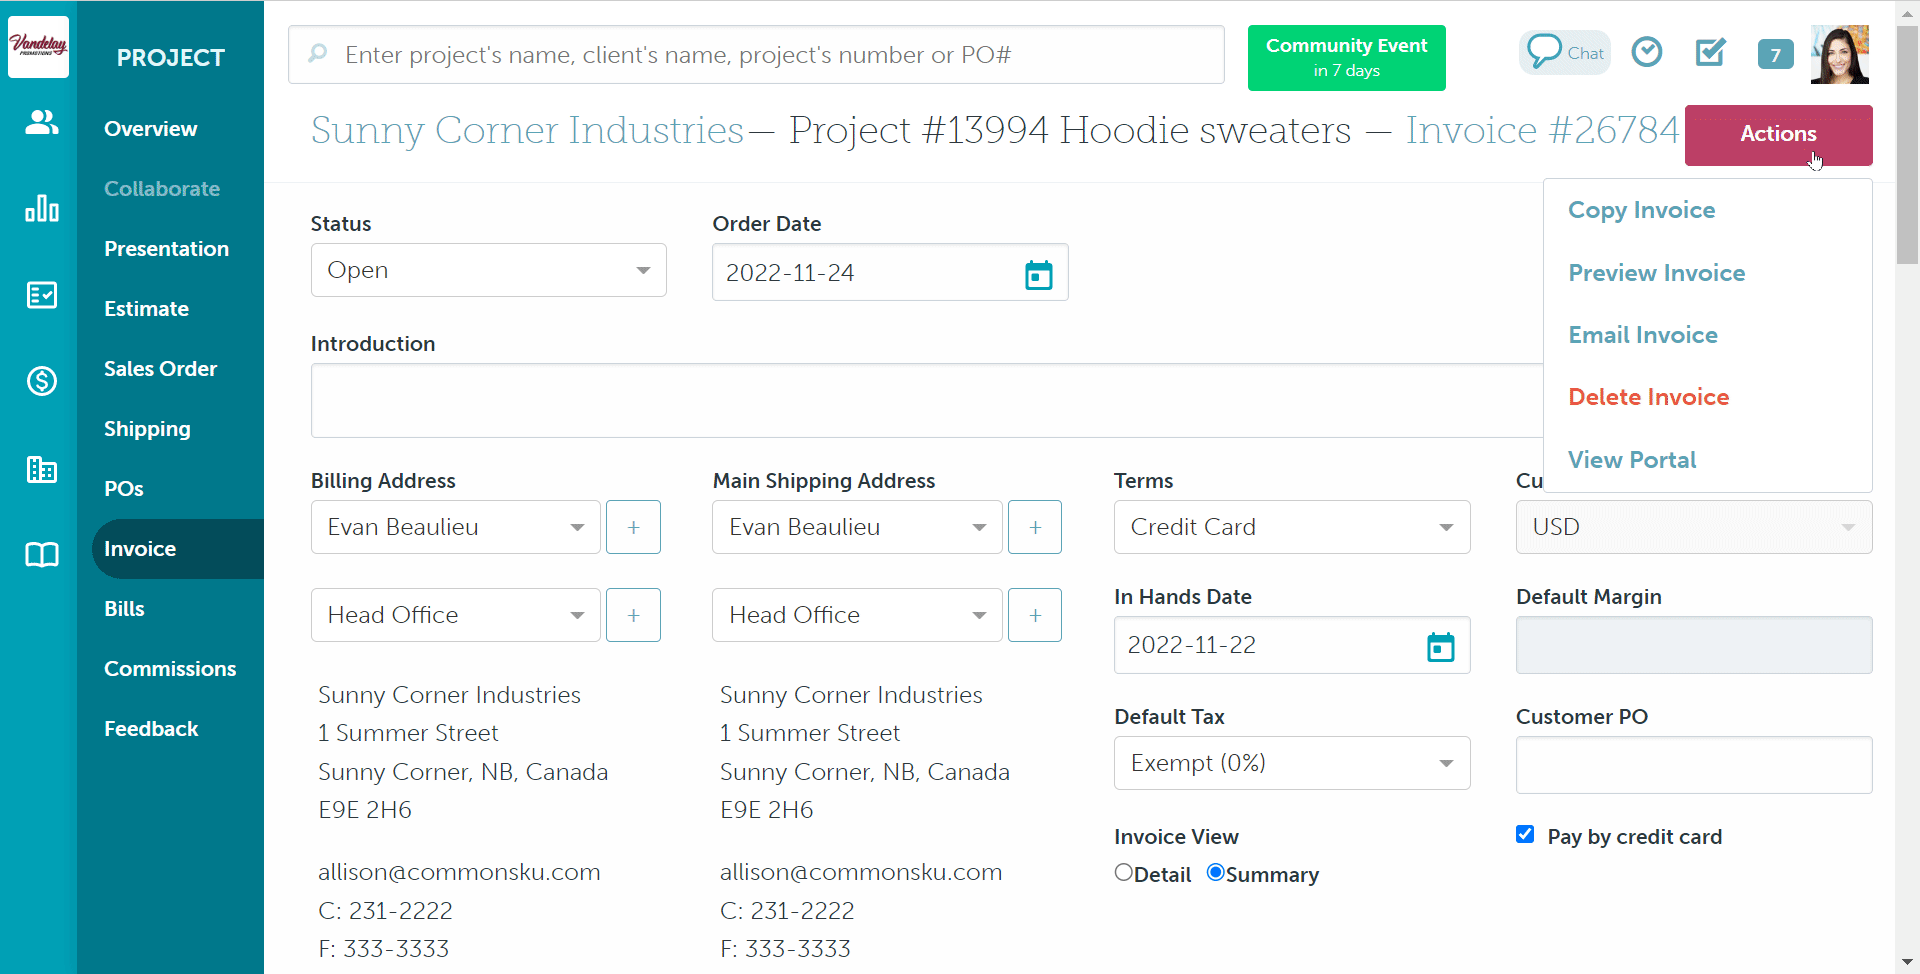
You can email an invoice to your client directly from the project. To email your invoice:
- Click the Actions button
- Select Email Invoice
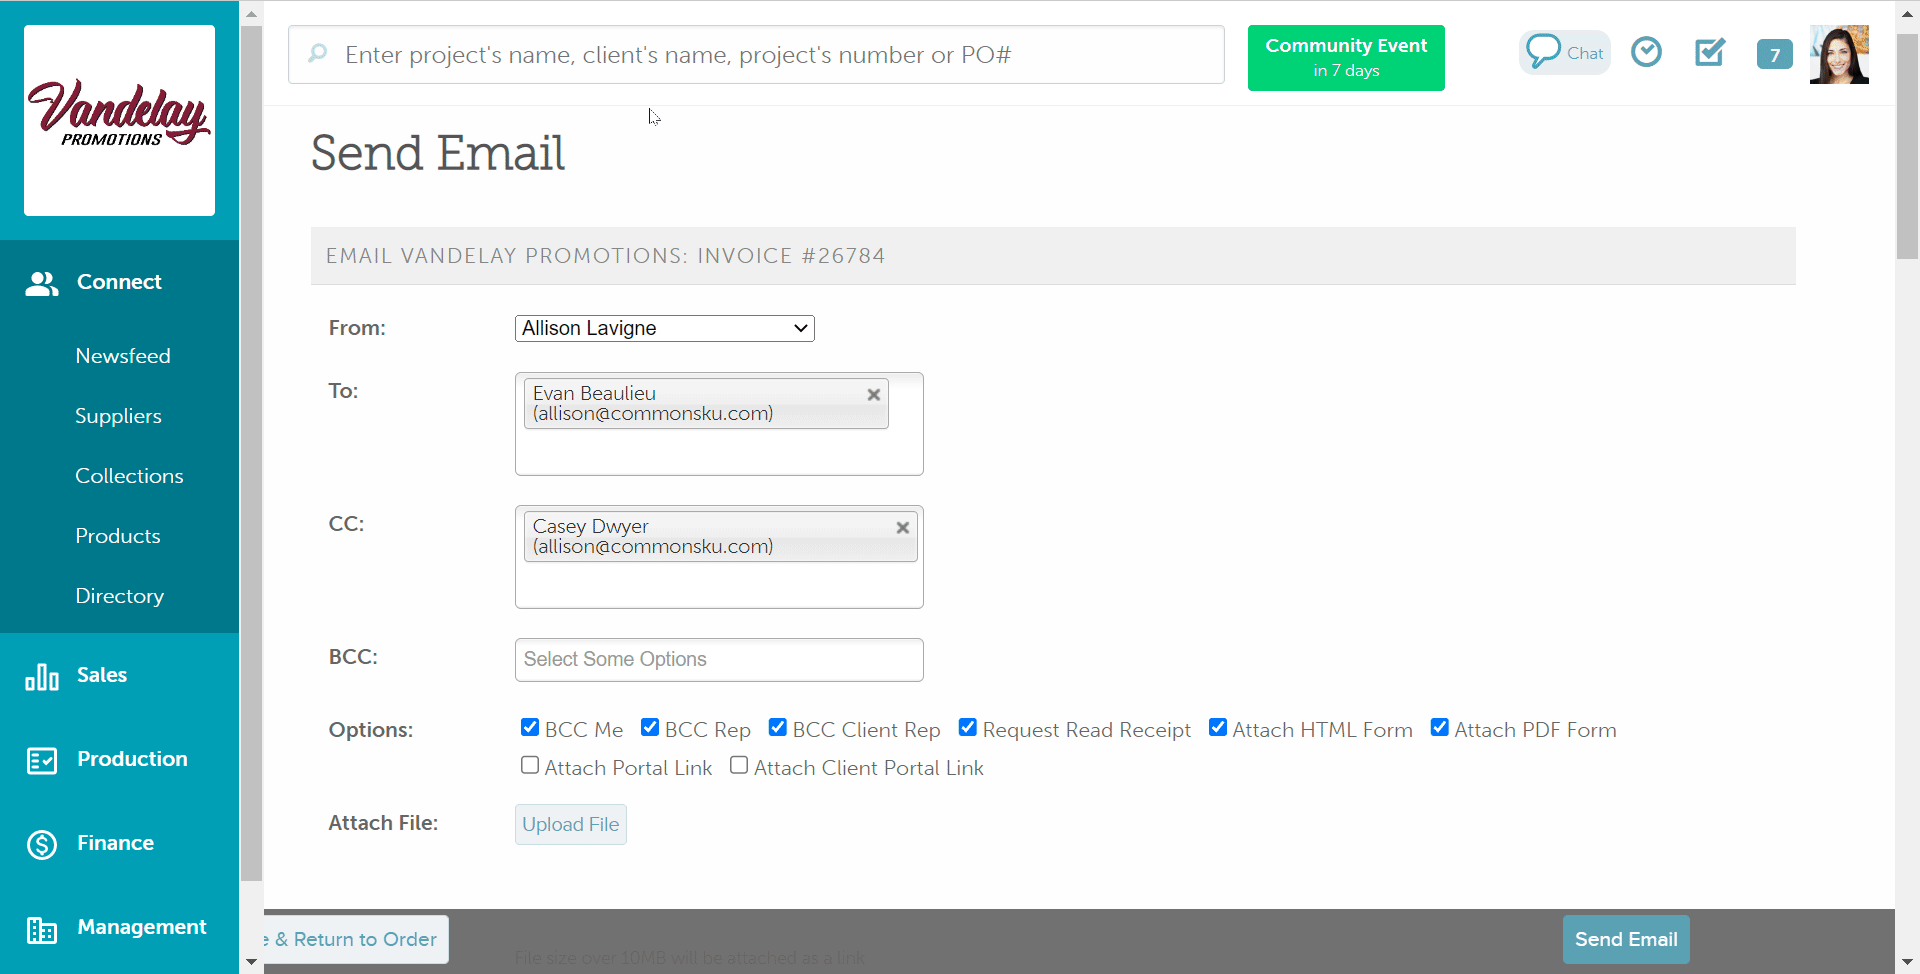
- Enter your email details
- Click Send Email (bottom of the page)
Once you have emailed the invoice out of commonsku, it's status will change to Sent to Client, and the outgoing email will log in the project's Activity tab.
[Back to top]Email contacts
Sending From
Emails sent from commonsku appear to come from your contact email, but you can also send emails on your team members' behalf.
To change the "From" address:
- Click the "From" drop-down at the top of the page
- Select the team member/email address you'd like the email to appear that it's coming from

Sending To
The "To" field automatically populates with the initial client contact's email. To add more email addresses, click into the "To" box to either:
- Choose a contact listed on the client's page
- Manually type a new email address
You can also click into the "CC" or "BCC" fields to cc/bcc a contact from your client's page.

There's no way to automatically populate your teammates' emails in the "To," "CC," or "BCC" fields. The drop-down list only shows contacts listed on the client's page.
Invoicing Contact
Any client contact who is listed under the accounting department on the client page will automatically be added to the CC field when you email invoices out of commonsku.
Email options
You can check or uncheck any of the "Options" boxes to:
- BCC yourself (BCC Me)
- BCC the order rep (BCC Rep)
- BCC the client rep (BCC Client Rep)
- Request a read receipt (Request Read Receipt)
- Attach an HTML version of the invoice (Attach HTML Form)
- Attach a PDF version of the invoice (Attach PDF Form)
- Include a link to the project portal (Attach Portal Link)
- Include a link to the client portal (Attach Client Portal link)
-png-3.png?width=688&height=349&name=commonsku%20(18)-png-3.png)
Invoices send as static documents, which means they don't update in real time. If you make adjustments to an invoice, you will need to send your client the revised version.
Attaching a file
To upload a file to your email, click the Upload File button.
From there, you can choose a file by either:
- Clicking Project Files > select the file
- Clicking Client Files > filter through the folders (optional) > select the file
- Clicking Upload > select the file by dragging and dropping or click within the blue lines to load from your computer > click Done > click Close
All file attachments are accessible from the original email in the project's overview.
Email templates
Email templates are a collection of pre-written text that you can pull into your email's message body. Your Admin can create/edit your teams' shared templates through the Admin Tab.
To use a template, you can either:
- Click the "Template" drop-down and select from the existing templates
- Click Add Template to create a new one

Subject line/message body
The email's subject line automatically populates with:
- Your company name
- The form type
- The form number
Your message body is a text field where you can compose your email.
-png-4.png?width=688&height=354&name=commonsku%20(19)-png-4.png)
Invoice preview
Scroll to the bottom of the email screen to see a final preview of the invoice.
- If you need to adjust something, click Close & Return to Order.
- If everything looks good, click Send Email.
FAQ
- Can I save a PDF version of the invoice?
- How many emails am I allowed to send at once through commonsku?
Can I save a PDF version of the invoice?
Of course! To save a PDF version of the invoice:
- In the project's Invoice tab, click Actions
- Select Preview Invoice
- Print the invoice by right clicking your mouse and select print, click Crtl + P (Windows), or click Command + P (Mac)
- In the print pop-up, select Destination: Save as PDF
- Click Save
How many emails am I allowed to send at once through commonsku?
Users are permitted to send emails at a rate of 60 per hour, 10 per minute, and a maximum of 15 bounced emails within a 24-hour period. If you exceed these limits, you will need to wait before sending additional emails.
In the event that a user attempts to send too many emails in a short timeframe, an error message will appear stating, You have reached the email sending rate limit.
