Client portals is not available to teams subscribed to commonsku's Essentials plan. The Advanced plan or higher is required in order to use this tool.
On this page:
Sending a portal link to a client
Creating a default portal
During your initial set-up, you will need to create a default portal that can be used for all of your clients.
- Click the Clients tab > Portals
- Click New Portal
- Make all required updates and changes to the portal settings
- Click Create
-png-1.webp?width=670&height=138&name=Clients%20(5)-png-1.webp)
Once a default portal has been created, there are three tabs from which you can customize your portal's details:
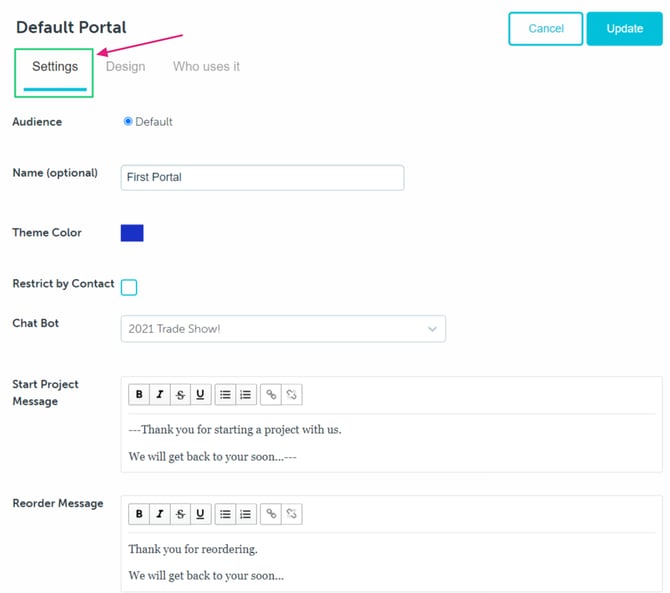
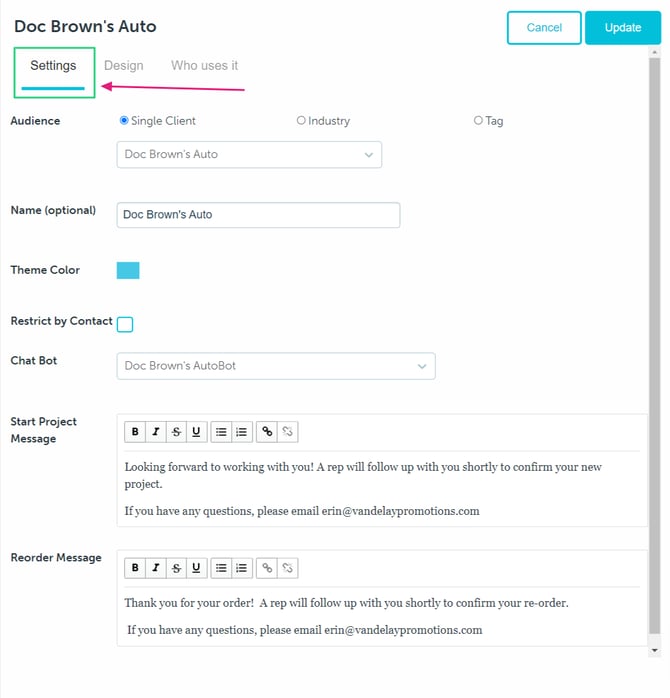
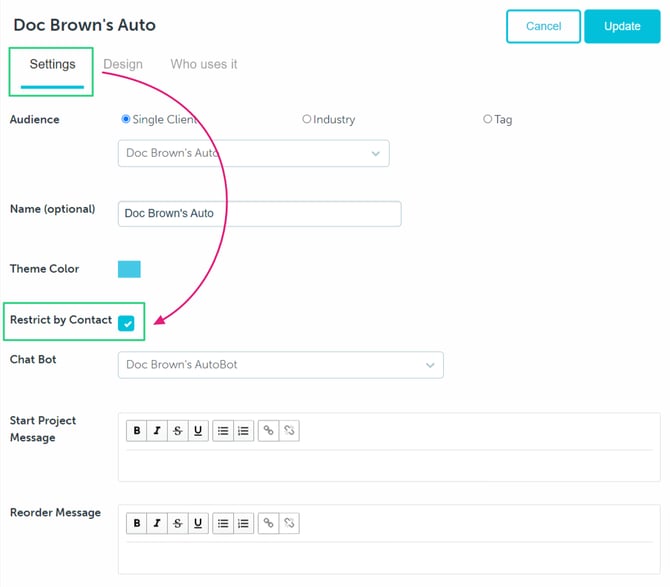
Settings
From the Settings tab, you can:
- Select an Audience - in the case of your default portal, you will have to select "Default"
- Create a Name for your portal (optional) - this is an internal label that your team can use to identify the portal
- Select a Theme color
- Restrict by Contact (optional)- clicking to enable this feature will only allow client contacts accessing the portal to see projects where they are assigned as either the billing or shipping contact.
- Add an existing Chat Bot
- Customize your Start Project message - this message will appear once a user has created a new project from the portal
- Customize your Reorder message - this message will appear once the user has placed a re-order from the project portal
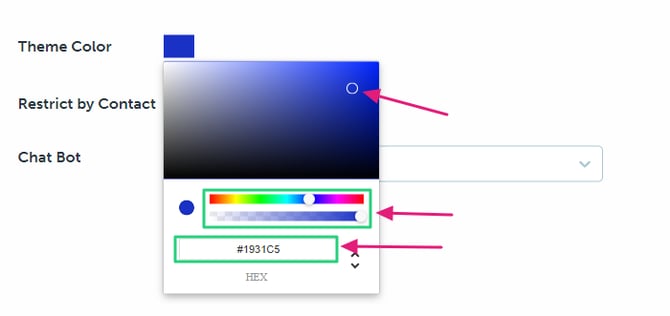
How to select a theme color
The theme color your select will apply to all of the text and clickable buttons within your client-facing portal.
To select a theme color:
- Click on the Theme Color box
- Click and drag the toggle along the color spectrum, then click into the color gradiant and drag your cursor until you find your desired color, or
- Type the HEX code for the color you need into the text field, and use the arrows on the right side to adjust red, green, and blue levels
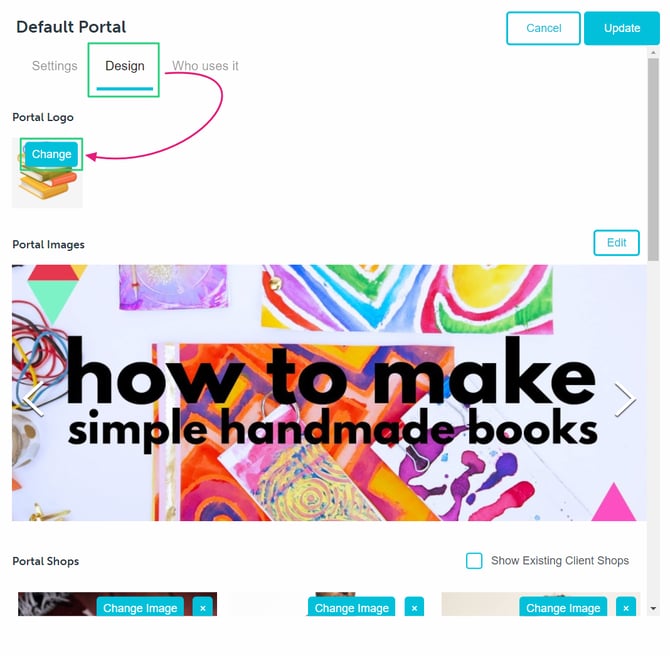
Design
To customize the images within your portals:
- Select your Design tab and click Edit
The design tab allows you to customize three separate areas of your portal:
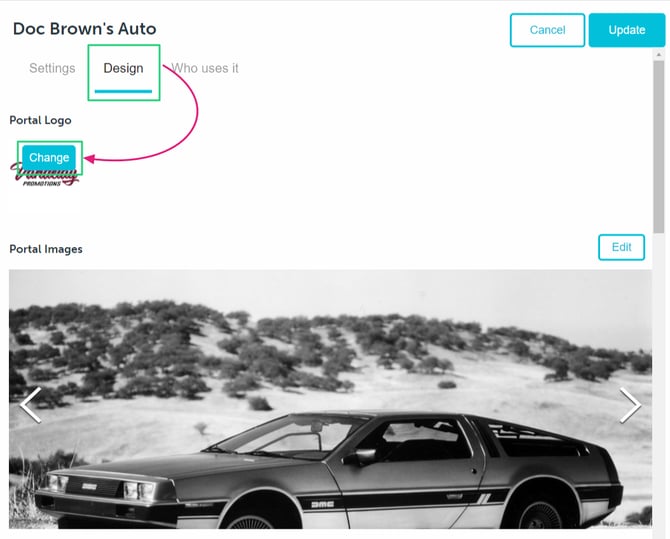
Portal Logo
Your portal logo appears in the top left corner of the client portal. To change the portal logo image:
- Click the Change button on the current portal logo image
- Select the file you need from your computer > Open
Recommended sizing for your portal logos would be either 400x400 pixels or 600x600 pixels. This image would need to be a perfect square.
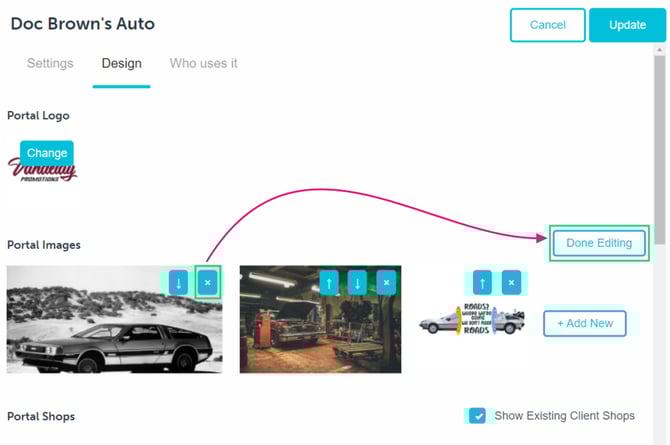
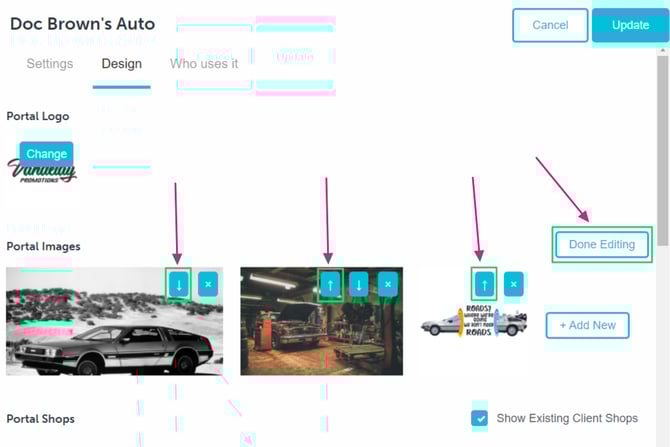
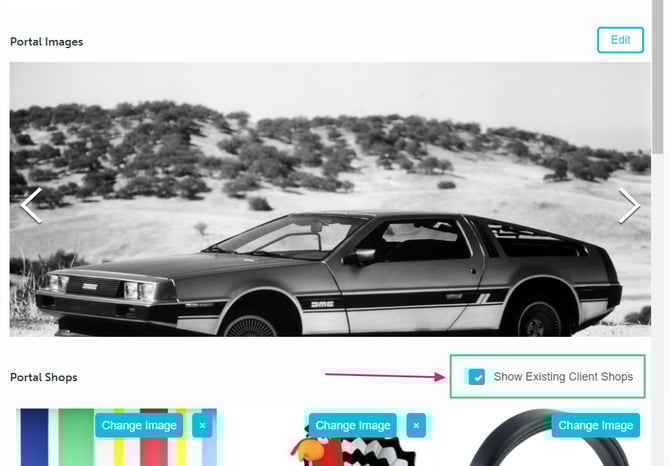
Portal Images
Portal images are displayed as a scrolling banner along the top of your client portals. Each image is displayed for 5 seconds before scrolling to the next image.
To add images to your client portal banner:
- Click Edit in the top right corner of the banner image
- Click + Add New
- Select the file you need from your computer > Open
- Click Done Editing
commonsku tip: Keep in mind that for your default portal, you want to try and keep your images generic rather than client specific. We recommend using between three and five images for your client portals. Recommended sizing for these images would be 1456 x 1007 pixels.
To delete an image from your client portal banner:
- Click Edit
- Click the "X" in the top right corner of the image you want to delete
- Click Done Editing
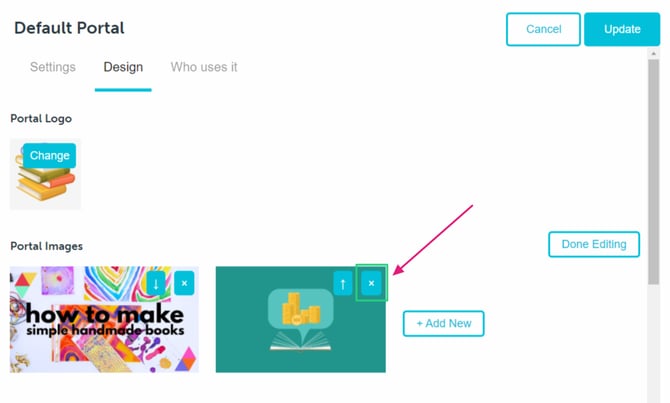
To re-arrange the order in which your portal images display:
- Click the upwards or downwards facing arrows in the top right corner of each image until they're in the desired order
 Once your images are uploaded, you can use the arrows on either side of your banner to scroll through and preview your banner.
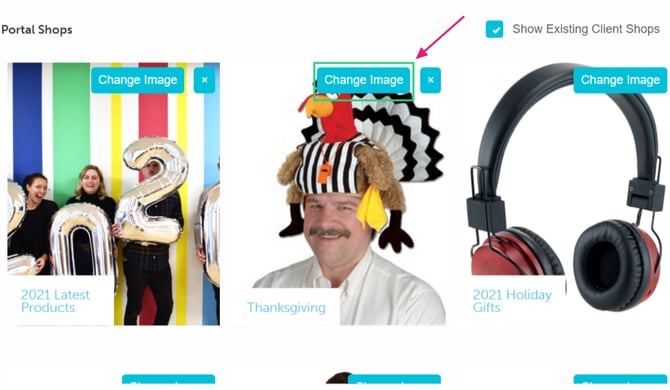
Portal Shops
To assign a Marketing shop to your portal:
- Under Portal Shops > click into the Add a new shop ... drop down menu
- Select an existing Marketing shop
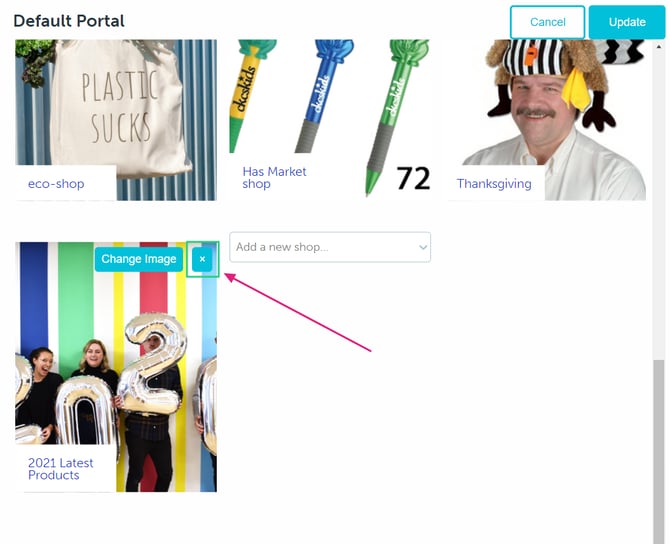
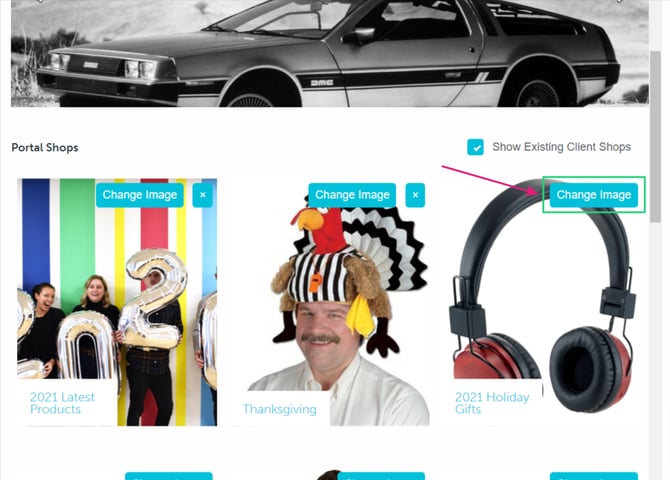
To update the image that displays for the assigned marketing shop:
- Click the Change Image button that appears on the assigned shop tile
- Select the file you need from your computer > Open
To delete an assigned Marketing shop from the portal:
- Click the blue x in the top right corner of the shop tile
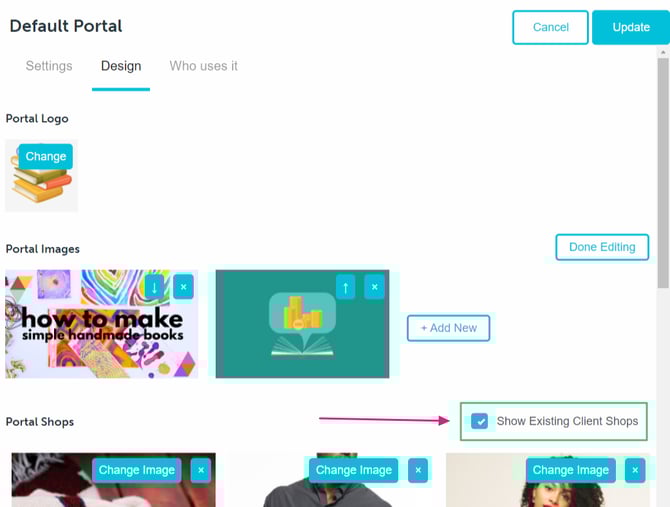
If you want the client portal to also display existing Company shops and Pop-up shops for the clients using the default portal:
- Click to check the box next to "Show Existing Client Shops"
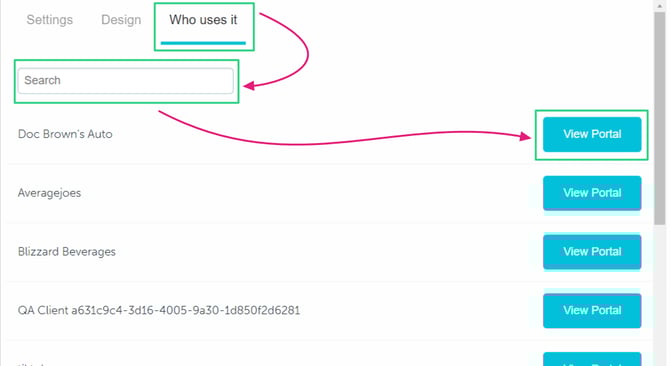
Who uses it
Your default portal will automatically be assigned to all client accounts listed inside of your commonsku account.
To preview the default client portal for each of your clients:
- Type a client's name into the Search bar
- Click View Portal next to the client whose portal you would like to preview
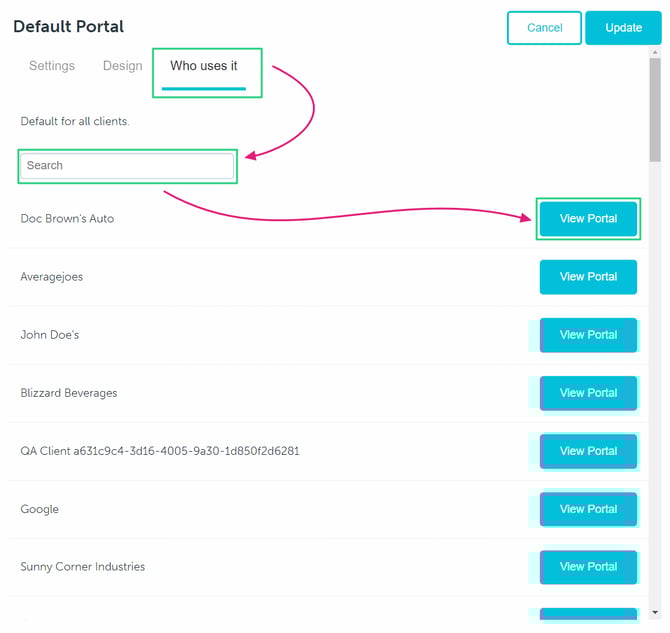
This preview is the same portal your client sees when they open the link for their client portal. You can interact with the portal from here in the same way you client can interact with the live version.
Once you have finished your edits on the Settings, Design, and Who uses it tabs, don't forget to click the Update button in the top right corner of your edit screen to lock in your changes.
Creating a new portal
Once your default portal has been created, you can create additional portals for specific clients, industries, or for groups of clients with the same client tag applied.
- Click the Clients tab > Portals
- Click New Portal
- Make all required updates and changes to the portal settings
- Click Create
-png-1.png)
In the pop-up edit screen, there are two tabs from which you can customize your portal's details:
The "Who uses it" tab will only appear after the portal has been created.
Settings
In the Settings tab, you will need to:
- Select an Audience
- Create a Name for your portal (optional) - this is an internal label that your team can use to identify the portal
- Select a Theme color
- Restrict by Contact - clicking to enable this feature will only allow client contacts accessing the portal to see projects where they are assigned as either the billing or shipping contact
- Add an existing Chat Bot by selecting the exisiting chat bot from the drop-down
- Customize your Start Project message - this message will appear once a user has created a new project from the portal
- Customize your Reorder message - this message will appear once the user has placed a re-order from the project portal
Selecting an Audience
To select an Audience (which accounts will have access to the new portal):
- Click to select the relevant Audience option
- Click into the Audience drop-down to select the client account, Industry, or Tag (client tag) you need
When selecting an audience for a new portal, you can choose between:
- Single client - this portal will only be used by a single existing client
- Industry - this portal will be used by all clients listed under a specific industry
- Tag - this portal will by used by all clients assigned to a specified client tag
How to select a theme color
The theme color your select will apply to all of the text and clickable buttons within your client-facing portal.
To select a theme color:
- Click on the Theme Color box
- Click and drag the toggle along the color spectrum, then click into the color gradiant and drag your cursor until you find your desired color, or
- Type the HEX code for the color you need into the text field, and use the arrows on the right side to adjust red, green, and blue levels
Design
To customize the images within your portals:
- Select your Design tab and click Edit
The design tab allows you to customize three separate areas of your portal:
Portal Logo
Your portal logo appears in the top left corner of the client portal. To change the portal logo image:
- Click the Change button on the current portal logo image
- Select the file you need from your computer > Open
Recommended sizing for your portal logos would be either 400x400 pixels or 600x600 pixels. This image would need to be a perfect square.
Portal Images
Portal images are displayed as a scrolling banner along the top of your client portals. Each image is displayed for 5 seconds before scrolling to the next image.
To add images to your client portal banner:
- Click Edit in the top right corner of the banner image
- Click + Add New
- Select the file you need from your computer > Open
- Click Done Editing
commonsku tip: We recommend using between three and five images for your client portals. Recommended sizing for these images would be 1456 x 1007 pixels.
To delete an image from your client portal banner:
- Click Edit
- Click the "X" in the top right corner of the image you want to delete
- Click Done Editing
To re-arrange the order in which your portal images display:
- Click the upwards or downwards facing arrows in the top right corner of each image until they're in the desired order
Once your images are uploaded, you can use the arrows on either side of your banner to scroll through and preview your banner.
Portal Shops
To assign a Marketing shop to your portal:
- Under Portal Shops > click into the Add a new shop ... drop down menu
- Select an existing Marketing shop
To update the image that displays for the assigned Marketing shop:
- Click the Change Image button that appears on the assigned shop tile
- Select the file you need from your computer > Open
To delete an assigned Marketing shop from the portal:
- Click the blue x in the top right corner of the shop tile

Existing Client Shops
If you want the client portal to also display existing Company shops and Pop-up shops for the client(s) using the portal:
- Click to check the box next to "Show Existing Client Shops"
To update the image that displays for a client's Company or Pop-up shop:
- Click the Change Image button that appears on the assigned shop tile
- Select the file you need from your computer > Open
You can only adjust the images of client owned shop if the portal has been created for a single-client audience.
Who uses it
The list of clients who can access and use the portal you've built will display in this tab depending on the audience selection you made in the Settings tab.
To preview the client portal for each of your clients:
- Type a client's name into the Search bar (if assigning the portal to more than one client)
- Click View Portal next to the client whose portal you would like to preview
Once you have finished your edits on the Settings, Design, and Who uses it tabs, don't forget to click the Update button in the top right corner of your edit screen to lock in your changes.
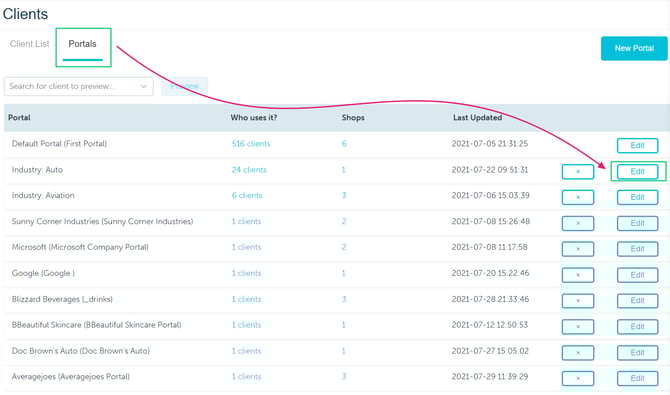
Editing an existing portal
To edit an existing portal:
- Click the Clients tab > Portals
- Click Edit next to the portal you need to update
- Make all required updates and changes to the portal settings
- Click Update
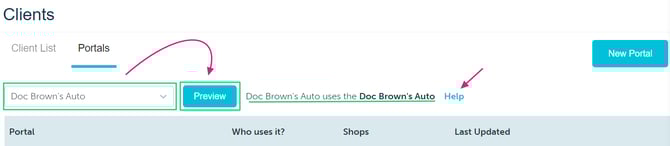
Previewing a portal
To preview a portal from the Portals tab:
- Either type the name of the client whose portal you'd like to preview into the Search field, or select the client you need from the drop-down
- Click Preview
Once you select a client, a note will appear to tell you which of your portals that client is assigned to. Click Help to watch commonsku's webinar on Client Portals.
To preview a portal from the portal's edit screen:
- Navigate to Clients > Portals
- Click Edit next to the portal you want to preview
- Click the Who uses it tab
- Click View Portal next to the client whose portal you want to preview
Sending a portal link to a client
To send a portal link to a client from the Portals tab:
- Either type the name of the client whose portal link you need into the Search field, or select the client you need from the drop-down
- Click Preview
- Copy the URL from your browser > Send it to the client either from your personal email, or from the client's contact page in commonsku
To preview a portal from the portal's edit screen:
- Navigate to Clients > Portals
- Click Edit next to the portal you need
- Click the Who uses it tab
- Click View Portal next to the relevant client
- Copy the URL from your browser > Send it to the client either from your personal email, or from the client's contact page in commonsku
Deleting a portal
To delete an existing portal:
- Navigate to Clients > Portals
- Click the "x" next to the portal you want to delete
- Click Delete in the pop-up that appears
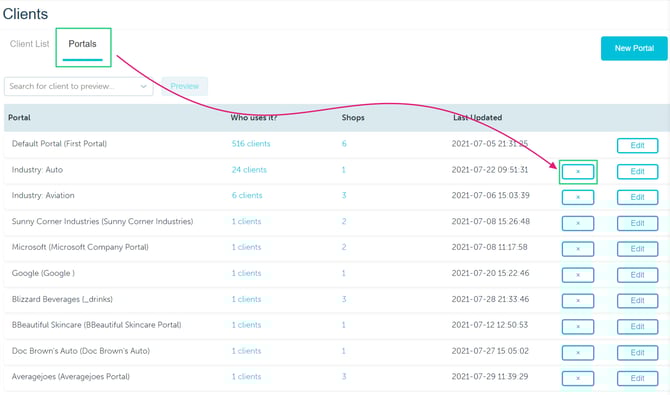
Deleted portals cannot be recovered. If you delete a client-specific portal, their portal link will redirect to the Default Portal.
Restrict by contact
By enabling this feature in a client portal, contacts using the portal will only be able to view and interact with projects where they are assigned as either the billing or shipping contact.
To enable this feature:
- Navigate to Clients > Portals
- Click Edit next to the portal you need
- Click the Settings tab
- Check the box next to Restrict by Contact
Client-facing view
Learn how your client would:
- Log in to the portal
- Use the Home tab
- Start a project
- View their project history
- Search for a project
- Open a project's portal
- Place a reorder
- Use the chatbot
Logging in to the portal
Each time your client opens their portal, the welcome screen will prompt them to enter their email. This email must match the email you have on file for them in commonsku.
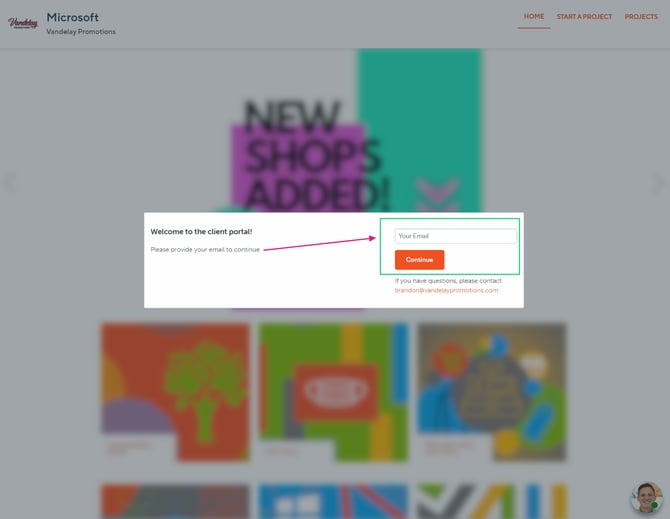
Once they've entered their email, commonsku will send them a PIN to enter into the portal. This email's sender will be the assigned Client rep on the client page. From there, they can enter the PIN and gain access to the portal.
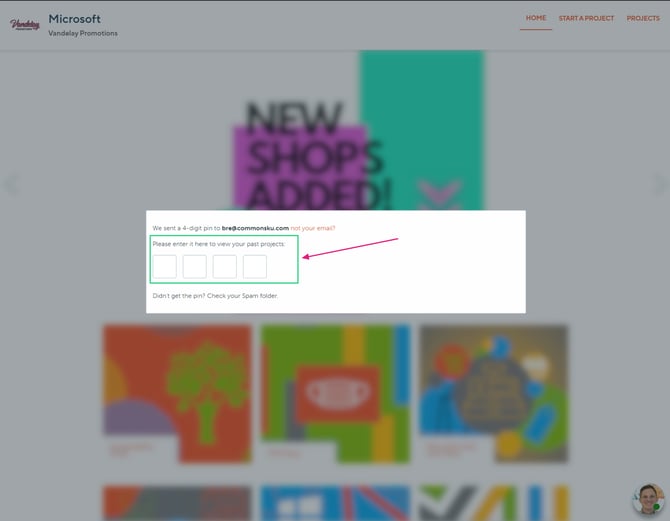
The PIN acts as a temporary password. Your client will need to enter a new PIN each time they access the portal.
Use the Home tab
The portal's Home tab displays
- a carousel of the portal's images
- the portal's shops
Your client can toggle between the portal images and click into their shops. In classic commonsku style, the shops will open in a separate tab, so your client will not lose track of their portal.
Start a Project
The Start a Project tab allows your client to start a new project directly from their portal!
Your client will need to enter:
- Details of what they're looking for
- When they need to the order by (their in-hands date)
- Their budget
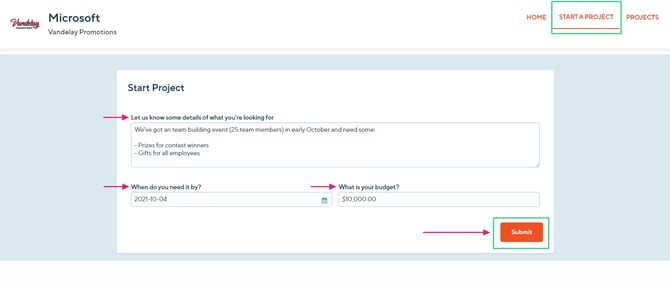
If you have created a custom Start Project message, it will appear once the user has clicked Submit.
Once your client submits their request, the client rep will receive an email with the new project's link. The details your client entered in their submission will automatically populate in the project's Overview tab.
commonsku Tip: The client rep can also track their open opportunities through their Dashboard and Projects tab.
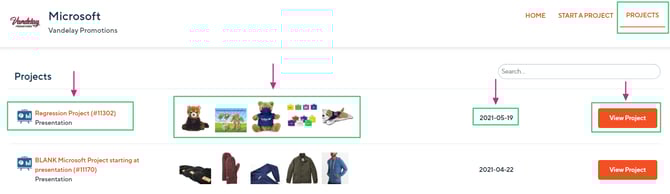
View their project history
The Projects tab gives your client a complete history of all their current and past projects.
It displays:
- The project's title, project number, and current sales form (presentation, estimate, sales order, or invoice)
- An image of each item in the sales form
- The sales form's creation date (order date)
- A "View Project" or "View/Reorder" button to access the project's portal
Presentations, Estimates, and Invoices that are not in Client Review (Presentations, Estimates) or Sent to Client (Invoices) status will not display in the client or project portal. In order for them to appear, you will either need to manually change the form's status, or email it to the client from commonsku so the status changes automatically.
If you selected "Restrict [access] by contact" in the portal's settings, the person logged into the portal would only see projects where they were the billing or shipping contact.
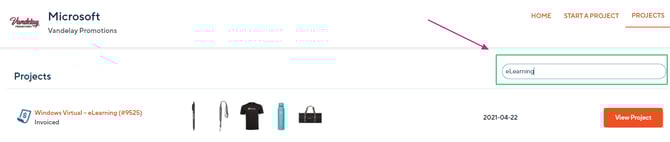
How to search for a project
The sales forms are listed based on their creation date (order date), with the most recently created placed at the top of the list. Your client can scroll through their project history or use the search bar to locate orders based on their project name or project number.
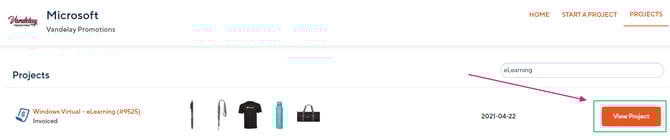
How to open a project's portal
To open a project's portal:
- Use the search bar or scroll to find the project you'd like to open
- Click the View Project or View/Reorder button
That will open the project's portal in a separate tab.
How to place a reorder
To place a reorder:
- Use the search bar or scroll to find the project you'd like to open
- Click the View/Reorder button to open the invoice within the project portal
- On the invoice, click the Reorder button
- Edit the product quantities
- Add notes (optional)
- Click Submit Order
If you have created a custom Reorder message, it will appear once the user has clicked Submit Order.
Once your client submits their request, the client rep will receive an email with the new sales order's link. The notes your client entered in their submission will automatically populate in the project's Overview, and the sales order will reflect the requested product quantities.
The View/Reorder button is not available for projects created from a shop.
Use the Chatbot
Once a chatbot is activated, your client will see a chat icon in the bottom right corner of their portal. They can start a conversation from the portal's Home, Start a Project, and Projects tabs.
FAQ
- Can I assign more than one portal to the same client?
- How can I remove a project from a client's portal?
- When does a project become available for reorder?
- Does my client have to enter a pin number every time?
- Do I need to have a certain permission to access a client portal where I'm not the client rep?
- Why isn’t my order appearing in the order status in the portal?
Can I assign more than one portal to the same client?
You cannot assign more than one portal to a single client. Client portals are set based on the following criteria:
- If you've created a custom portal for your client, then that will always be their portal
- If the client doesn't have a custom portal, commonsku will assign them to the portal that matches their client tag
- If the client doesn't have a custom portal or a client tag, then commonsku will assign them to the portal that matches their industry
- If the client doesn't have a custom portal, a client tag, or an industry, then commonsku will assign them to the default portal
How can I remove a project from a client's portal?
Client portals show any project that hasn't been closed, deleted, and wasn't marked as a sample order. If you'd like to remove a project from the portal, you can either:
When can my client place a reorder?
Your client can place a reorder as soon as a project is invoiced. The "View/Reorder" button will appear when the invoice is created. The "View/Reorder" button is not available for orders that came from a shop.
If you have copied a sales order that was created from a shop, please note that subsequent orders will also not be available for reordering.
Does my client have to enter a pin number every time?
Yes, your client would need to check their email and enter a unique pin number every time they need access to the portal. The pin number is not an optional feature.
Do I need to have certain permission to access a client portal where I'm not the client rep?
Yes, you would need the "Modify Client Rep" permission. You can reach out to your Admin to provide you with the proper access.
Why isn’t my order appearing in the order status in the portal?
To ensure your order displays correctly in the order status section, first verify what is the Po status of the Order:
The Order Status tab is divided into three columns:
- Proofing - shows POs that are still in the proofing stages and have not been approved. POs displayed in this tab will show the product name(s) and the sales order's in-hands date.
- In Production - shows POs that are still in some stage of production between being Created and Confirmed by the supplier. POs displayed in this tab will show the product name(s) and the sales order's in-hands date.
- Shipped - shows POs that have been marked as Shipped or Ready for Billing. POs displayed in this tab will show the product name(s), the PO's shipping date, and the tracking ID(s).
Second; If your Decoration location in the Sales Order includes a 3rd-party decorator, it’s essential to provide complete artwork information. Orders with empty decoration fields or missing details in the decoration purchase order will create an empty Decorator PO and therefore will not appear in the order status.
Always confirm that artwork and all required decoration information are filled out before proceeding.