On this page:
What is the project overview?
A project overview helps you capture and manage critical details related to your project. As a best practice, ensure the project overview is complete before you begin creating client-facing forms.
Project newsfeeds
In the project newsfeeds, you can:
- Track order updates
- Post a note
- Pin logs in the newsfeed
- Comment on logs in the newsfeed
- Delete logs from the newsfeed
- @ mention other team members
- Create tasks for yourself and your team
- Upload products
- Add files
Track order updates on the newsfeed:
A project's newsfeed automatically logs:
- All notes/files/tasks posted to the project overview, or any of the POs in the project
- Emails sent directly from the project
- Emails that were forwarded to the project email
- Purchase order-related emails sent from the Production Report
- If a form was copied from another project
- When a payment is received through QuickBooks Online
- When the client submits feedback
- Status or stage changes on all forms
- Proof status changes
- When the sales order status automatically updates to either Client Change Requested or Client Approved, as well as who requested the change or approved the order
- When a proof automatically updates to either Client Approved or Change Requested, as well as who requested the change or approved the proof
You can delete a manual status or stage change but cannot delete logs for status or stage changes made by other members of your team.
You can use the drop-down menus at the top of the newsfeed to sort based on:
- Comments/activity from a specific team member
- Form-specific activity (i.e., all posts related to the sales order)

Your entire team gets notified if somebody comments on a sales order's approval/ change request. If you prefer not to notify your entire team, add a new note to the overview and tag the team members you'd like to inform.
Post a note
To post a note:
- Type your message into the "Post a note about this project" text field
- Click Post

Pin logs in the newsfeed
You can pin any logs in the project's Activity feed so that it appears at the very top of the feed.
To pin a log:
- Find the log you need
- Click the
 icon
icon
The pinned log will now appear at the top of the feed and can be identified as pinned by the blue line appearing on the left-hand side.

To unpin a log:
- Locate the log
- Click the
 icon
icon

Comment on logs in the newsfeed
To leave a comment on a log in the project's Activity feed:
- Click
 on the relevant log
 - Type your comment into the "Comment on this message..." text field
- Click Comment

Delete logs from the newsfeed
To delete a log from the project's Activity feed:
- Find the log you need
- Click the
 icon
icon - Click OK in the browser pop-up
The log will now be permanently removed from the newsfeed.

Only the user who originally created the log will be able to delete it - other users can comment on, like, or pin the log, but they cannot delete it. Individual comments on logs cannot be deleted. Logs for sales order approvals that the client has performed cannot be deleted.
@ mentioning a team member
You can use the notes section to @ mention a member of your team.

Creating a task
To create a task:
- Click the Task button
- Select a due date for your task
- Select a user to assign the task to (this can be yourself or another team member)
- Add the details of your task into the "Post a note about this project" text field
- Click Post

Tasks are automatically logged on the project's Activity feed, in the Projects tab, and in your Dashboards (Sales, Production, Finance, or Management).
Uploading a product
To add a product to the Project newsfeed:
- Click the Product button
- Select your product from ESP, SAGE, Distributor Central, your company database, Tagged, or Bookmarks (the background will not turn blue once the product is added)
- Click Close
- Add a note about your product into the text field (mandatory)
- Click Post

To add a product to the most recently created form within the project:
- Hover over the product and click the Add to button
- A banner will show the product was "Presented" once it's added to the form
To view a product's product page, click View Product.
Adding a file
You can upload files from the:
- Project artwork tab
- Client files (client page > Files tab)
To add/upload a new file in the project :
- Select the Action button
- Click on the Project Artwork Tab
- Click the file you need to from the Project files or Client files tab
- Select the artwork or file you wish to upload
- Click Post

Your teammates can download, pin, and comment on the files uploaded to project overview.
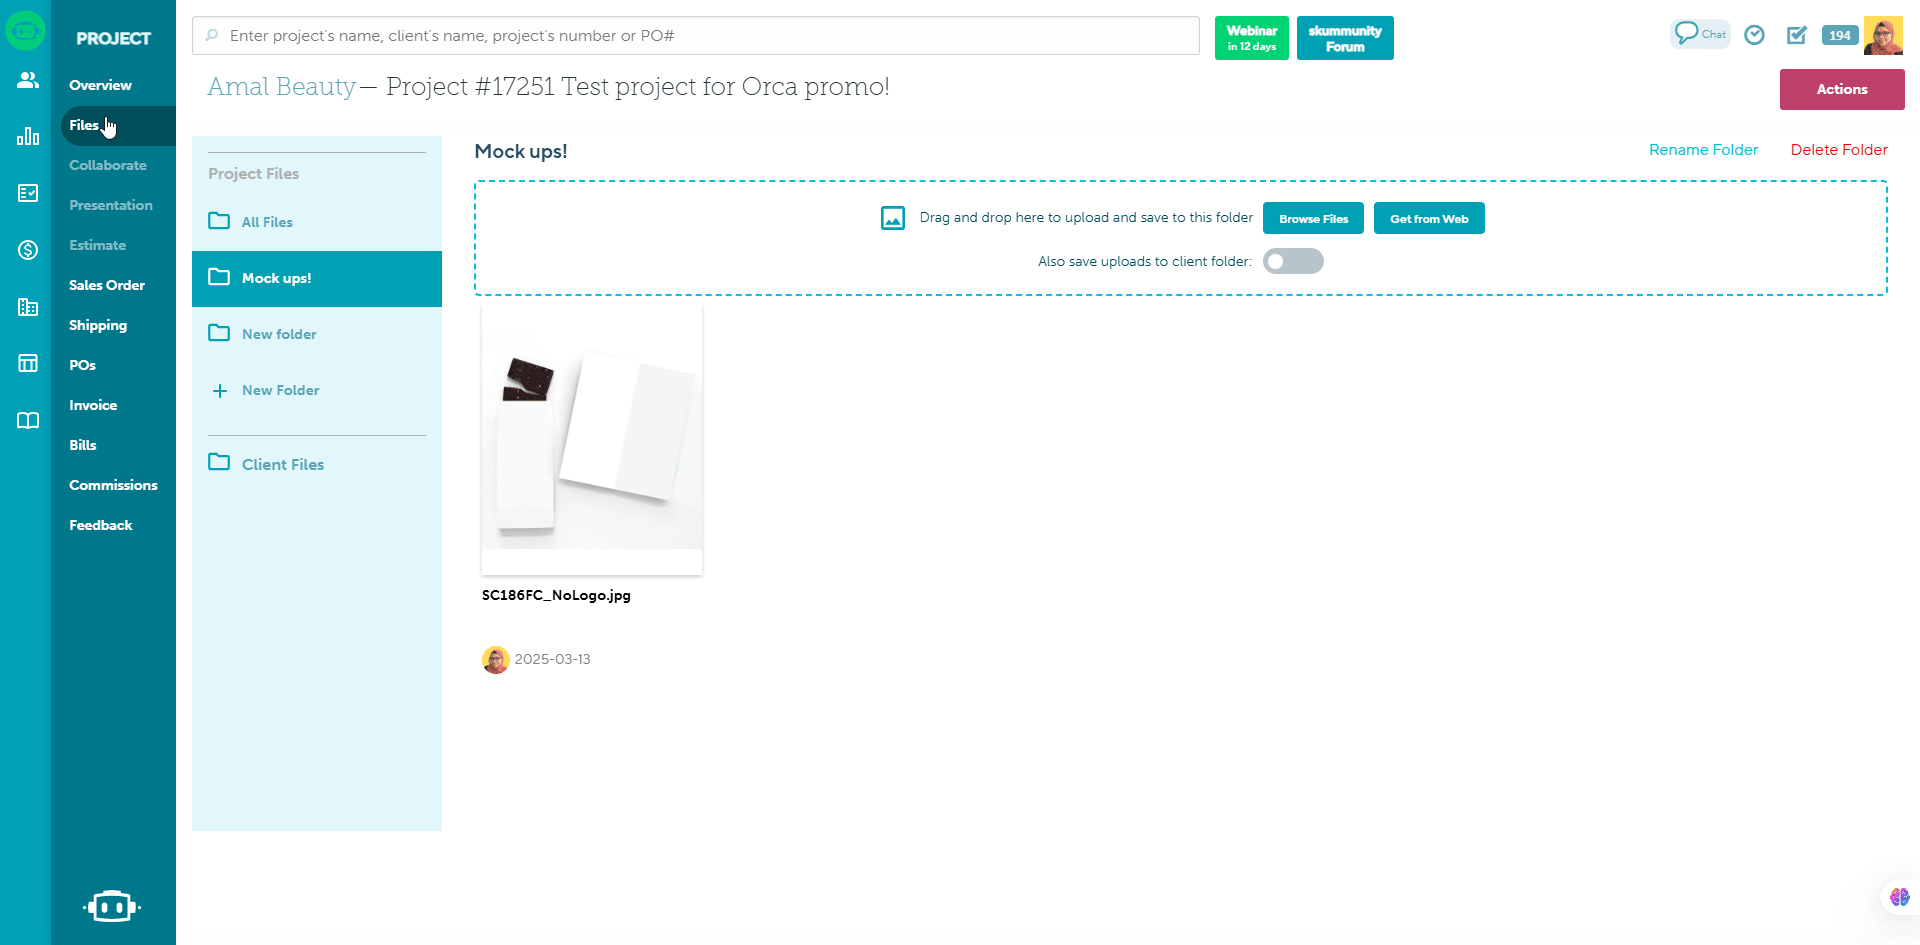
Files tab
The project artwork tab stores any project-related files, including artwork, mock-ups, drop-ship lists, and proofs. You can upload any file type and any file size. There's no limit to the number of files that can be uploaded and multiple files can be uploaded simultaneously. You can also create project file folders to organize your project related files.
To upload a file
- Click the Files tab (on the right side navigation)
- Select the file by clicking Browse to load from your computer or Get from the web by adding a url
- Create specific folders in the project file and drag the them into the folders if you like (optional)
- Select the toggle box to include the file on the client's page, and choose the specific file folder for future use (optional).
- Click Done
What can I do with these files?
- Hover your mouse over the file and click the Actions tab to download, rename, move or delete the file.
- The files are available to use on any product's artwork location.
Project status
A project's status indicates where the project is in the order process and is based on the most recently created form.
There are five project statuses:
- Opportunity
- Presentation
- Estimate
- Sales order
- Invoice
The project status automatically updates as you create new forms.
Project info
Project info captures essential details about your project, including the:
- Project name
- In-hands date
- Budget
- Event type
- Initial client contact
- Client rep
- Order rep
- Currency
- Tags
- Project email
- Project template
- Option to show a warning for Prop 65
Project name
The project name identifies the project and appears on the client-facing forms. You can change the project's name by typing your desired text into the "Project Name" field.
In-hands date
The in-hands date indicates the date the order needs to be completed, or "in the client's hands." The in-hands date automatically defaults to the project's creation date, but you can change it by clicking the "In Hands Date" field and selecting a date.
Budget
The budget represents the amount your client can spend on the project. You can set the budget by entering a dollar value into the "Budget" field.
Event type
The event type is used in your future reporting and any Collaboration requests. To change the event type, click the "Event Type" drop-down and select from the pre-determined list.
Initial client contact
The initial client contact is your original point of contact for the project. To change the contact, click the "Initial Client Contact" drop-down and select another person.
Client rep
The client rep manages the client's account and is usually called the account manager or account executive. The best practice is to assign the client rep directly on the client's page, so it defaults on each project, but you can also select the client rep on a per-project basis for commission purposes. The client rep and order rep may be the same person.
Order rep
The order rep is responsible for creating and inputting information into the project's client-facing forms and is usually called the account coordinator or junior account rep. The order rep automatically defaults to whoever created the project; from there, it can be re-assigned on a per-project basis. The client rep and order rep may be the same person.
Currency
Distributors who purchase products in one currency and sell them in another currency should use the Currency Conversion tool. For example, if you have a sales order where the products are in USD, and you need to sell them in CAD, then Currency Conversion is for you.
Tags
Order tags give the ability to create group reporting on a project level. You can use order tags to track anything, like reorders, referral resources, and if an order was made through a commonsku Shop. You can use order tags to filter your Sales Rep Report and Client Invoicing > Exported Invoices Report.
To create an order tag:
- Click the "Tags" text field
- Type your tag(s) into the field or select a tag(s) from the drop-down that populates as you type
- If you are creating a new tag, please select the option to create a new tag.

You can create new contact order or select existing order tags from the drop-down that populates as you type. Order tags can be managed through your Dashboard's Tags tile.
Project email
The project email is a forwarding address used to capture external emails inside of the project. The forwarded email posts on the project's overview, along with any email attachments.
To forward emails to your project:
- Click the
 icon to copy your unique project email
 - Paste the project email into the "bcc" field or "to" field, if you're sending the email directly to the project
- Send your email
Email forwarding is only available for email addresses associated with your company account. You cannot forward emails from a personal account, and your client cannot send emails to the project email address.
Project template
A new project automatically uses your team's default template, but you can change the template on a per-project basis.
To assign a new template:
- Click the "Project Template" drop-down
- Select the template you need

Your forms will be updated to reflect the template you've selected.
Show Warning for Prop 65
Select this option to add warnings for California's Prop 65.