On this page:
Choosing a Template
From the Design tab of your shop, you can choose from the various shop templates
available.
Distributor Templates
Distributor templates refer to personalized templates (commonsku templates) that users have saved for your own use. These are templates you can design internally. You can start from a commonsku layout or a bare layout and make edits and save them for the final design as your own personalized company templates.
To change the shop template :
- Click the Change template button in the right-hand corner
- Click Distributor Template (Your company's name) to view the list of templates saved
- Click Preview to see a preview of the template or Select template to choose a different template.
Do note: Only users with the permission to Credit, Modify and Edit templates will be able to set a template as default, edit or rename templates.
commonsku Templates
commonsku offers a thoughtfully curated collection of templates, meticulously designed by our in-house team of experts that you can use. These collections of templates will continue to grow over time.
To change the shop template :
- Click the Change template button in the right-hand corner
- Click commonsku Template to view the list of templates saved
- Click Preview to see a preview of the template or Select template to choose a different template.
Layout
After selecting your preferred templates, you have the opportunity to choose from five distinct layouts for your shop, the options as follows:
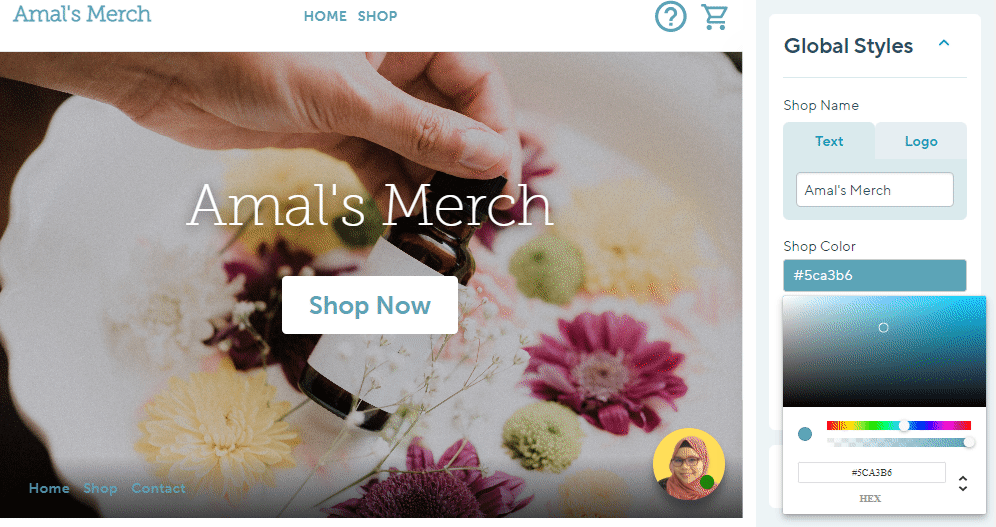
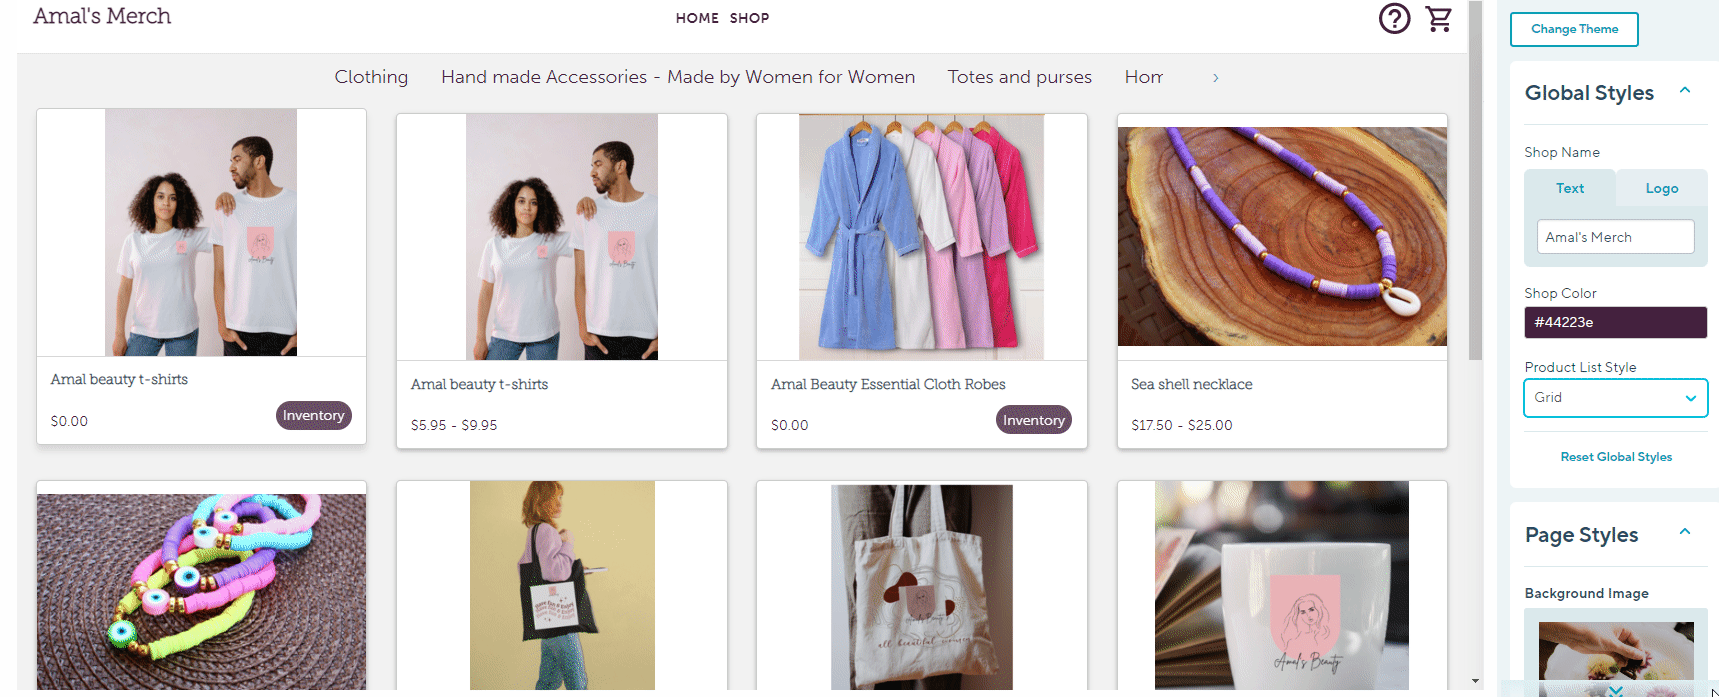
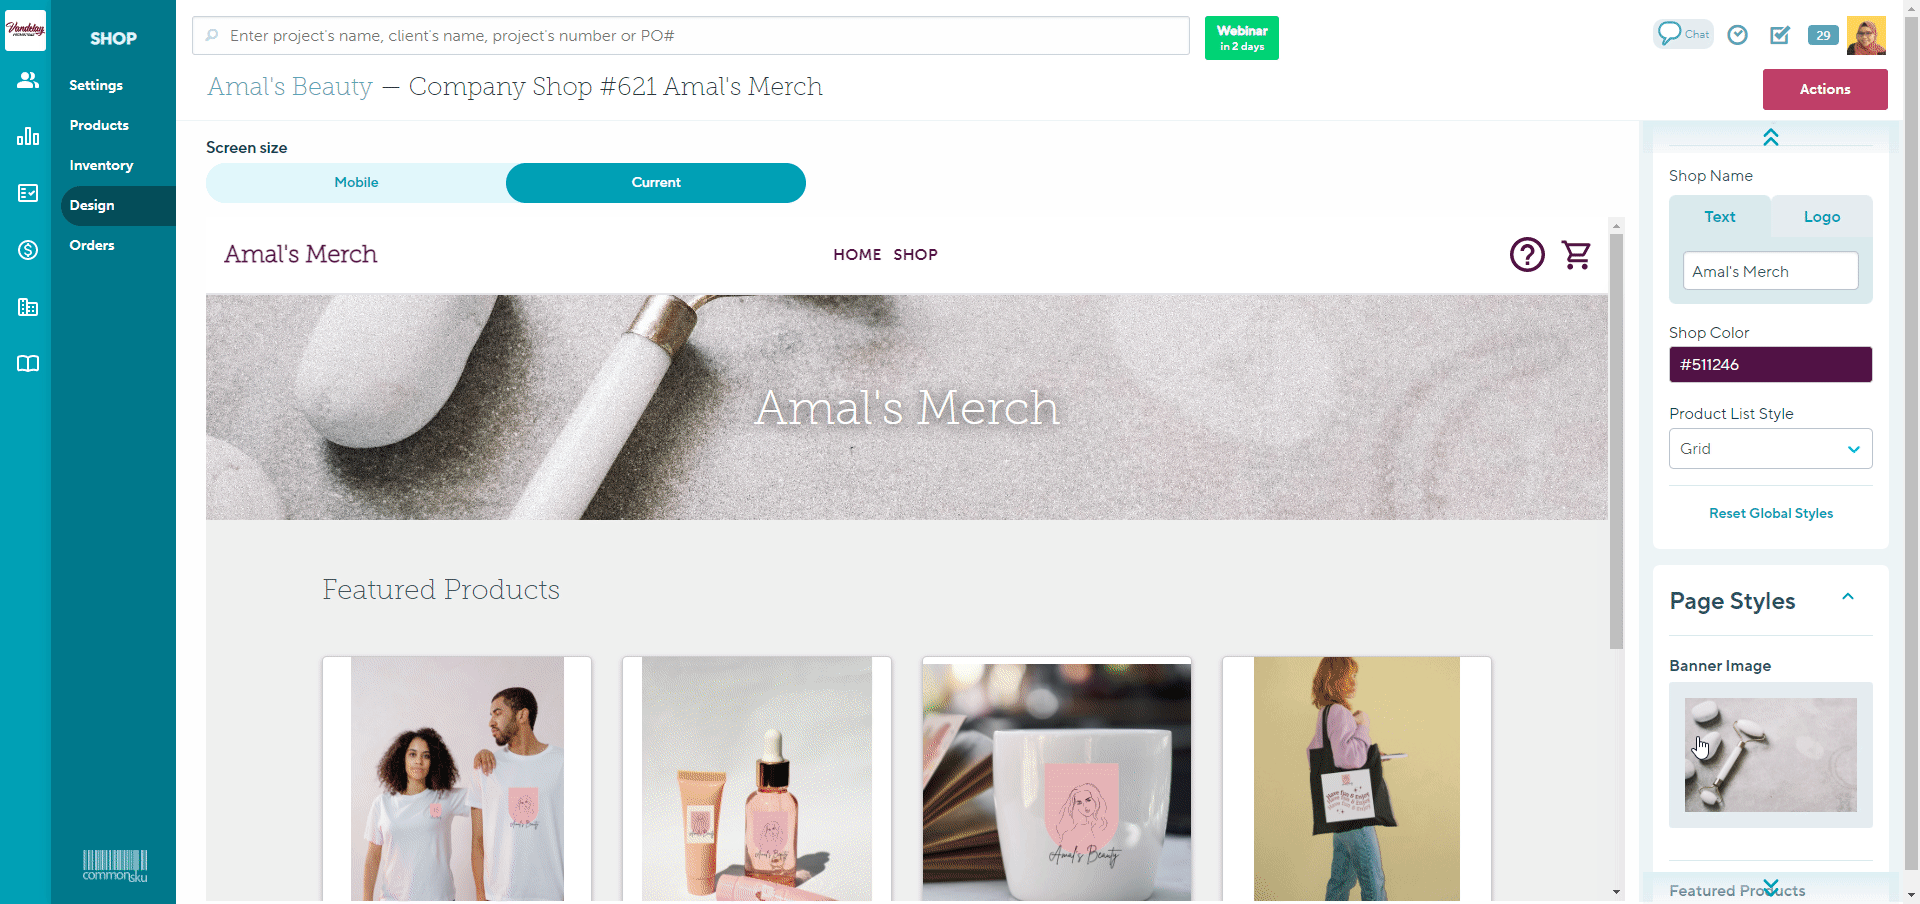
Global Styles
The Global Styles tab allows you to customize your Shop name, add a Shop logo, change your Shop color, and select your Product list style and Project Page style. You also have the option to reset the customizations here.
- Expanding and minimizing the menu
- Shop name and logo
- Shop color
- Product list style
- Product Page Style
- Resetting global styles
Expanding and minimizing the menu
To expand and minimize the menu, click on the arrow in the top right corner.
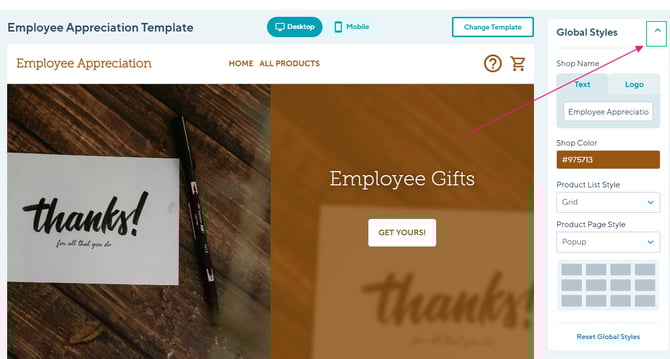
Shop name and Logo
To change your Shop name :
1. Click on the Text tab
2. Type in your preferred Shop name in the box field

To add a Logo instead:
1. Click on the Logo tab
2. Select Add Logo Image
3. Click + Add Image to Upload your own Image > select Image > select Open

Shop Color
Your chosen Shop Color affects the color of the different text and icons within a Shop.
To change the color:
- Click on the color box
- Either choose the color from the palette or enter the HEX, RGBA, or HSLA color you'd like to use
If you're using the Split Theme, the color also determines the color overlay that appears on the landing page's right-hand side.
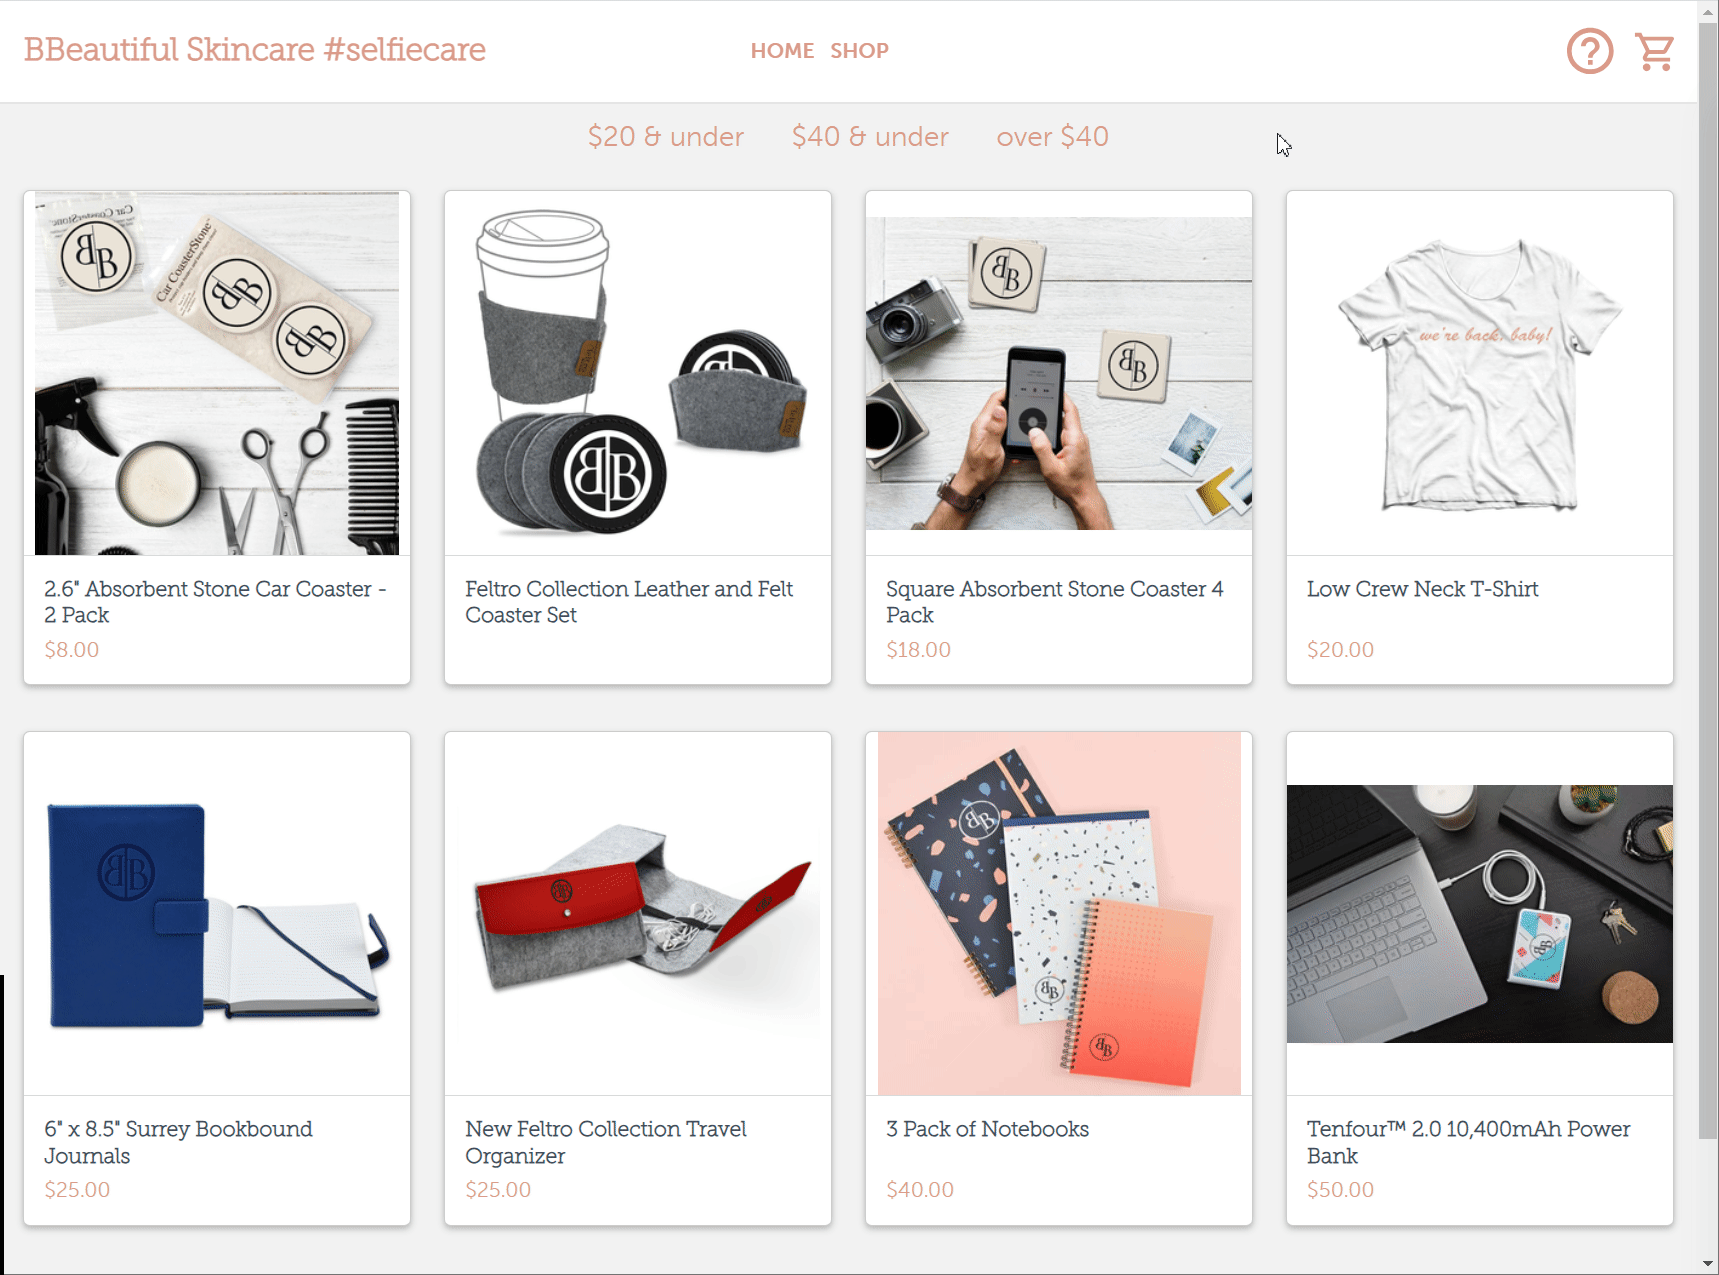
Product list style
The product list style determines how you present the shop's products to your client. There are two styles to choose from:
- Tile - this format is the same style as the Gallery and Smart Gallery presentation styles. It is responsive and adapts to different image sizes, making it perfect for displaying images with various widths and heights. Your shoppers can hover over the products to view the product name and price range.
- Grid - this format standardizes the product's images, so they are all square and in line with one another. It also shows each product's name and price range, without your shopper having to hover over the different items.
To change the product list style:
- Click the "Product List Style" drop-down and make your selection
Product Page Style
The Product page style determines how you present your shop's products to your client.
There are three styles to choose from:
Carousel - this format allows you to display your products as one interactive slide. Your shoppers will be able to easily click on the arrow button to view all the products as one rotating gallery.
Popup - this format allows your shopper to view a pop-up view of the products.

Dropdown - By clicking on the product, this format will have the shoppers viewing the products as a dropdown list.
To change the product page style, click the "Product page Style" drop-down and make your selection.

Resetting Global styles
Click on the Reset Global style button > Reset style if you would like to clear the changes made and revert to the default options.
Once you have selected to Reset Styles, you will not be able to Undo the action.
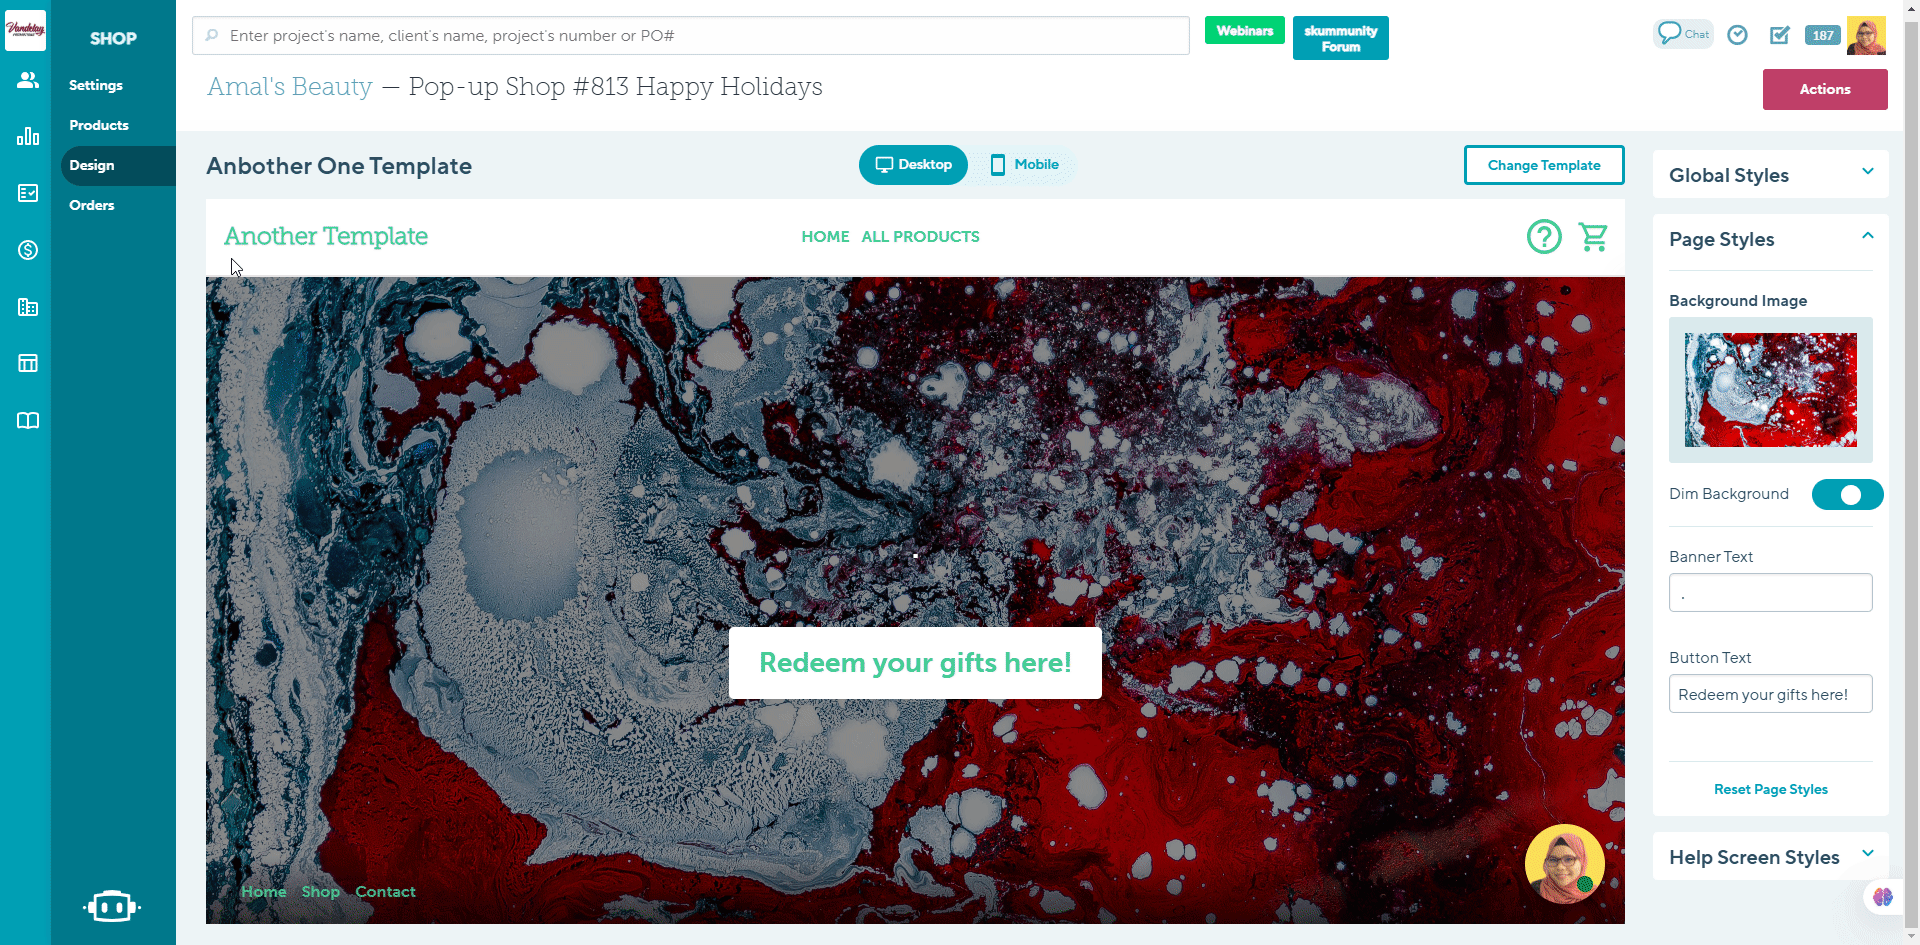
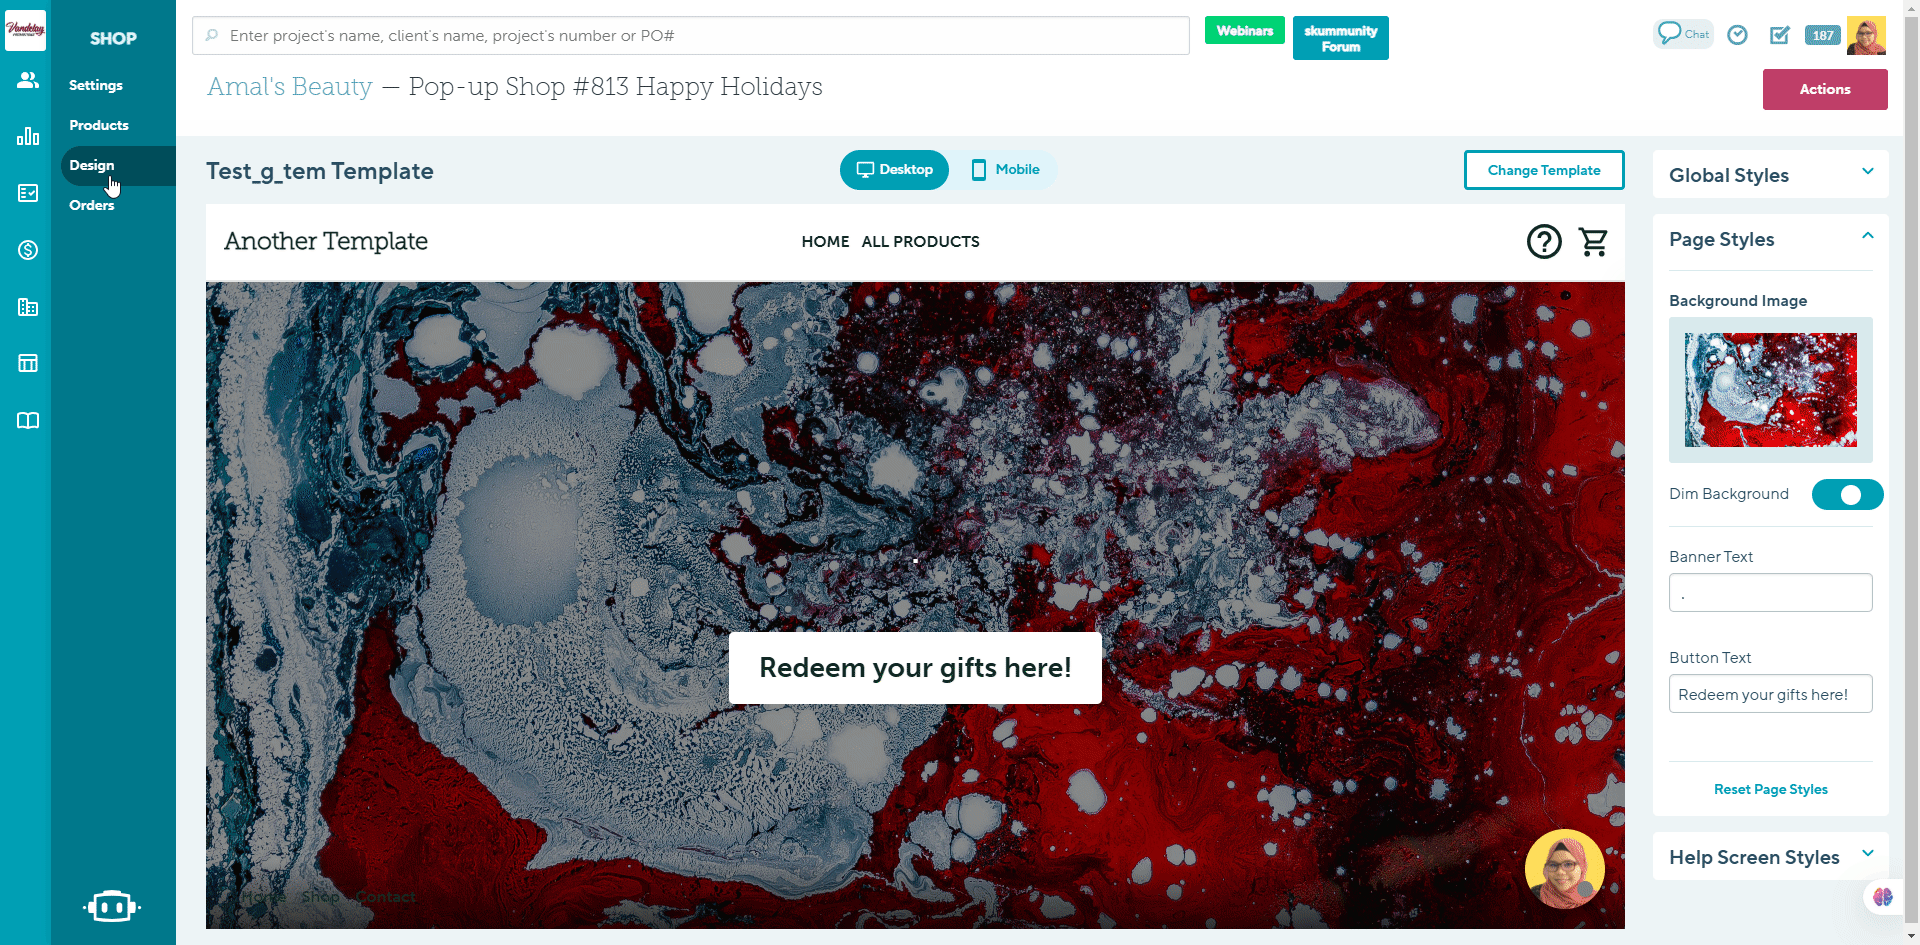
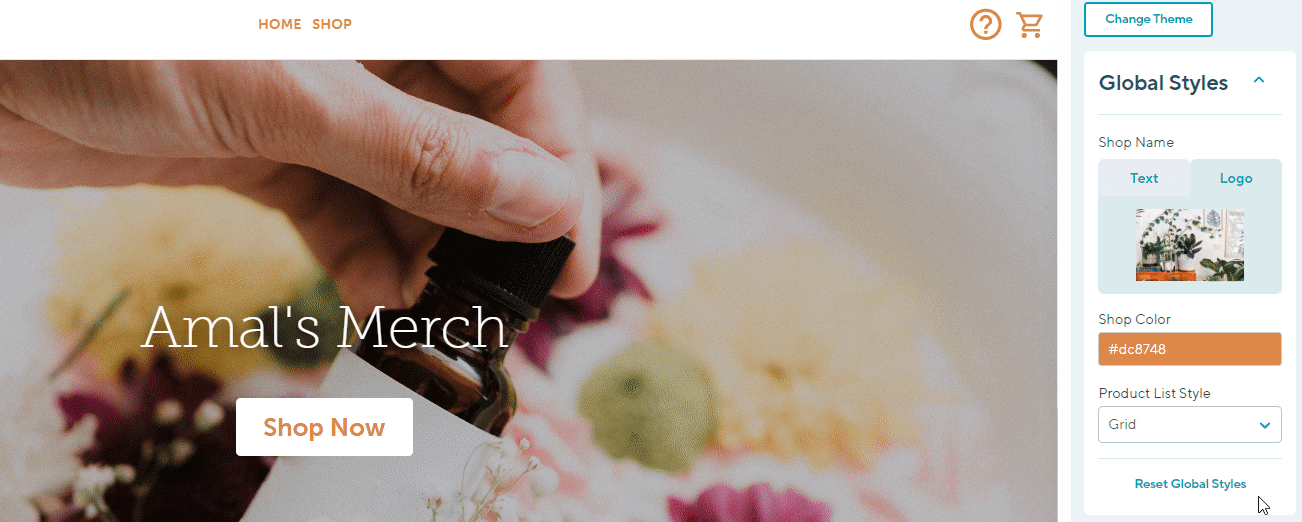
Page styles
Each shop has four themes for you to choose from and the Page Styles tab allows you to customize the layouts you have selected.
Expanding and minimizing the menu
Click on the arrow in the top right corner to expand or minimize the menu.

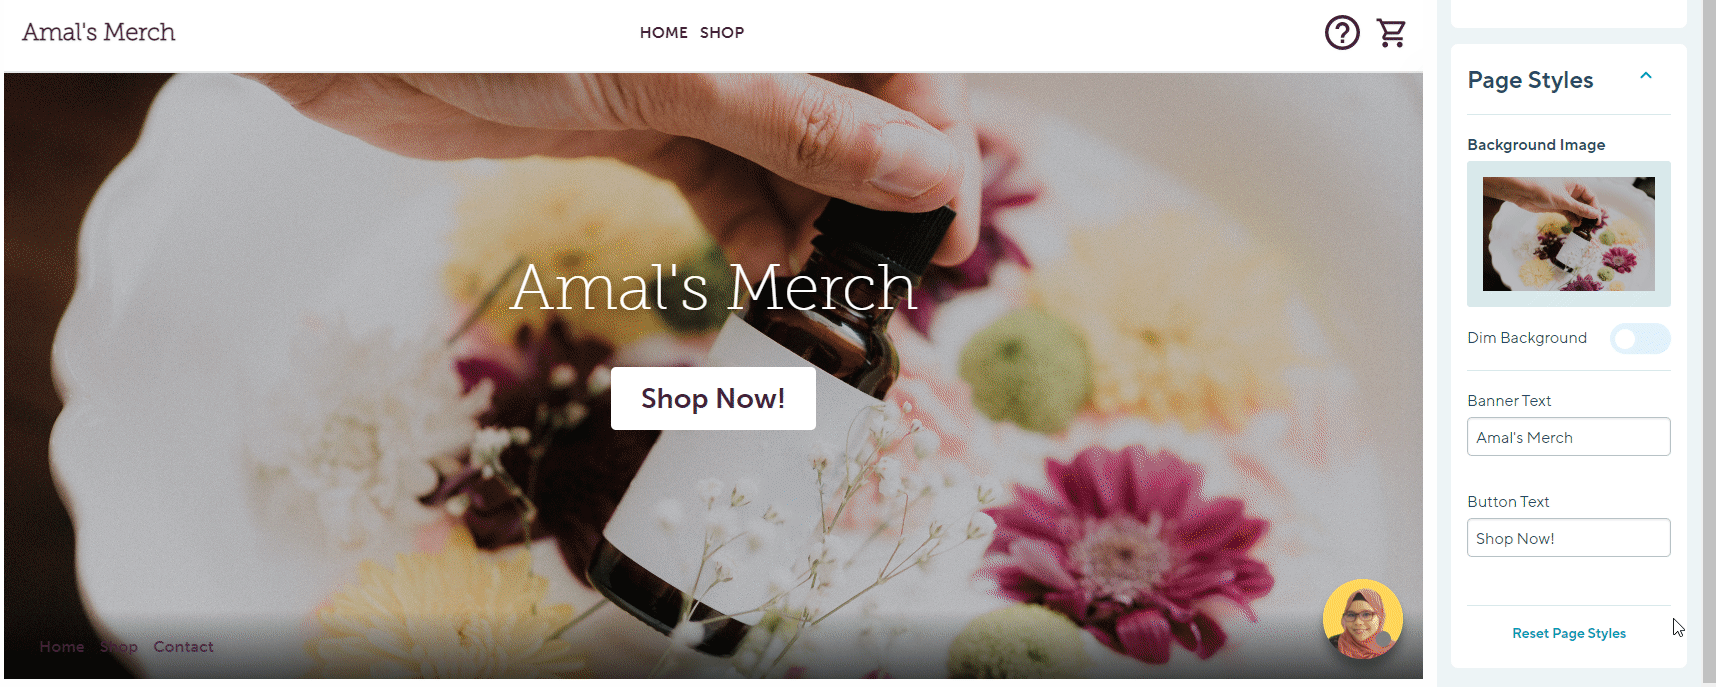
Billboard
This layout features a large background image sized at 1456 x 1007 pixels.
This theme allows you to update settings including:
Dim Background
If you'd like to dim the background image of the shop's landing page, click on the toggle to have it switched on or off.

Banner and Button Text
You can customize the Banner text to change the title on the shop's landing page and the Button text that appears in the "Shop button.
To customize the Banner and Button text:
1. Click on the Banner or Button text field
2. Enter the text you'd like to use

Background Image
You can choose to upload your own image or use Unsplash to customize your shop's landing page.
To upload an Image:
- Click the Background Image box
- Click the Upload tab
- Click Upload Image > select the file, or drag and drop the image you need
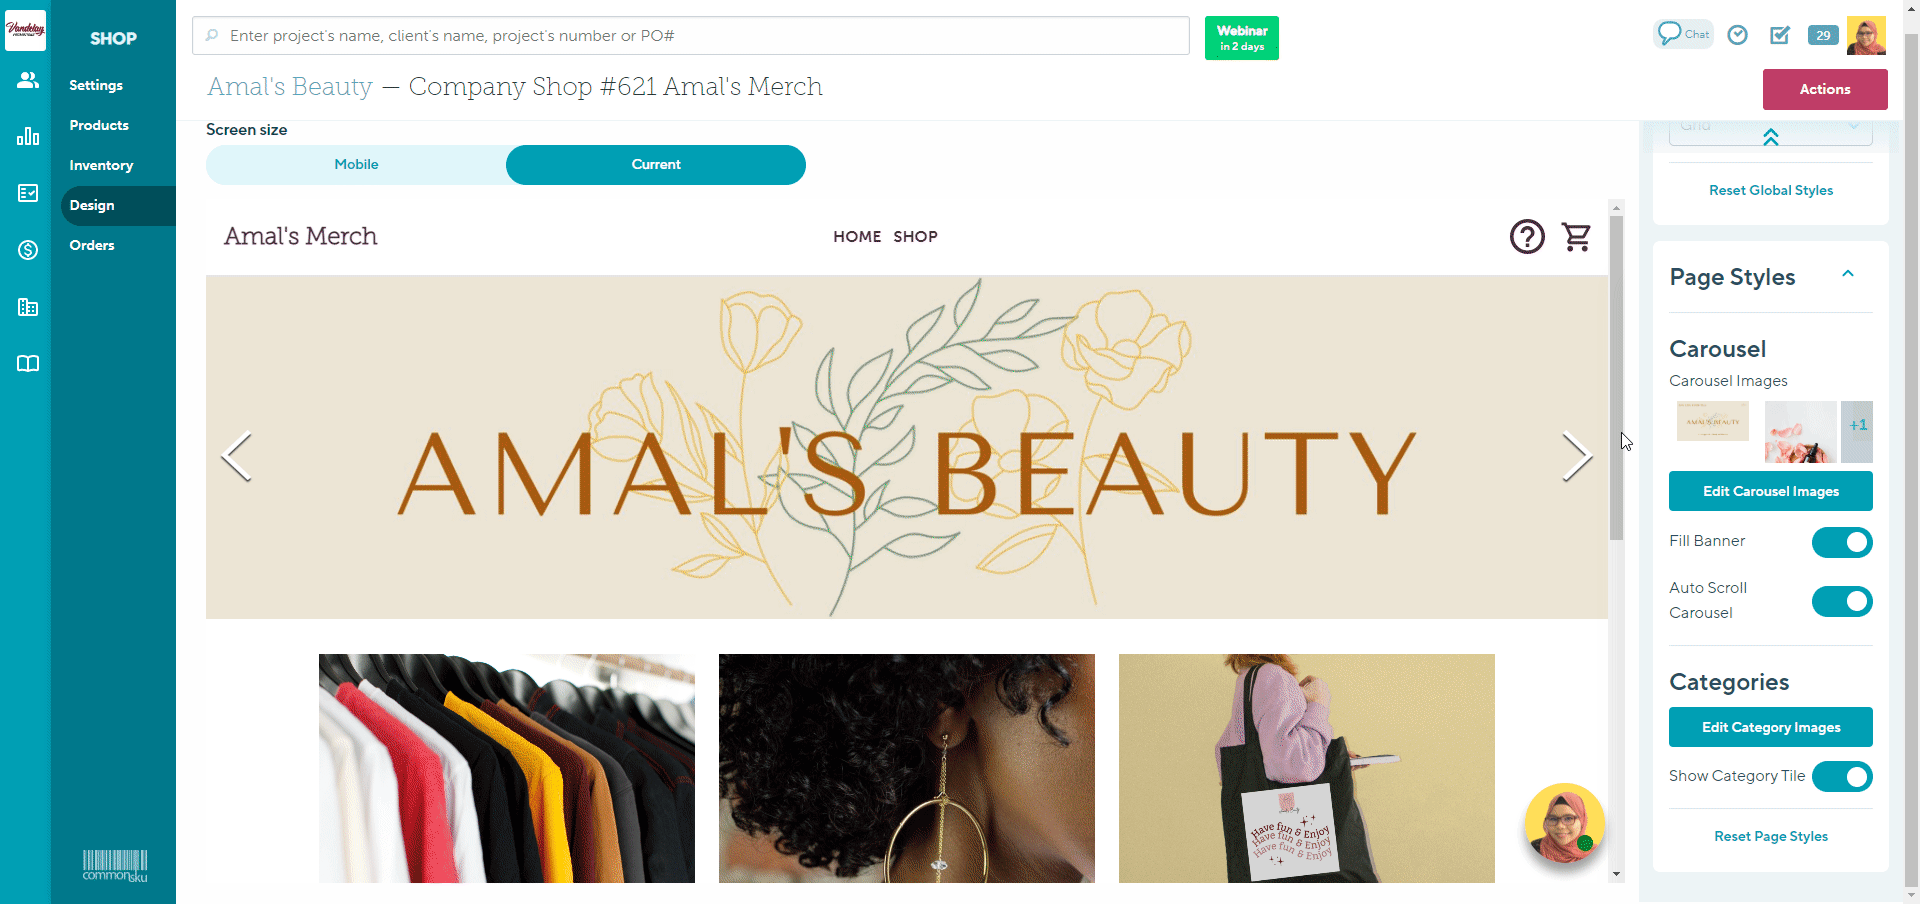
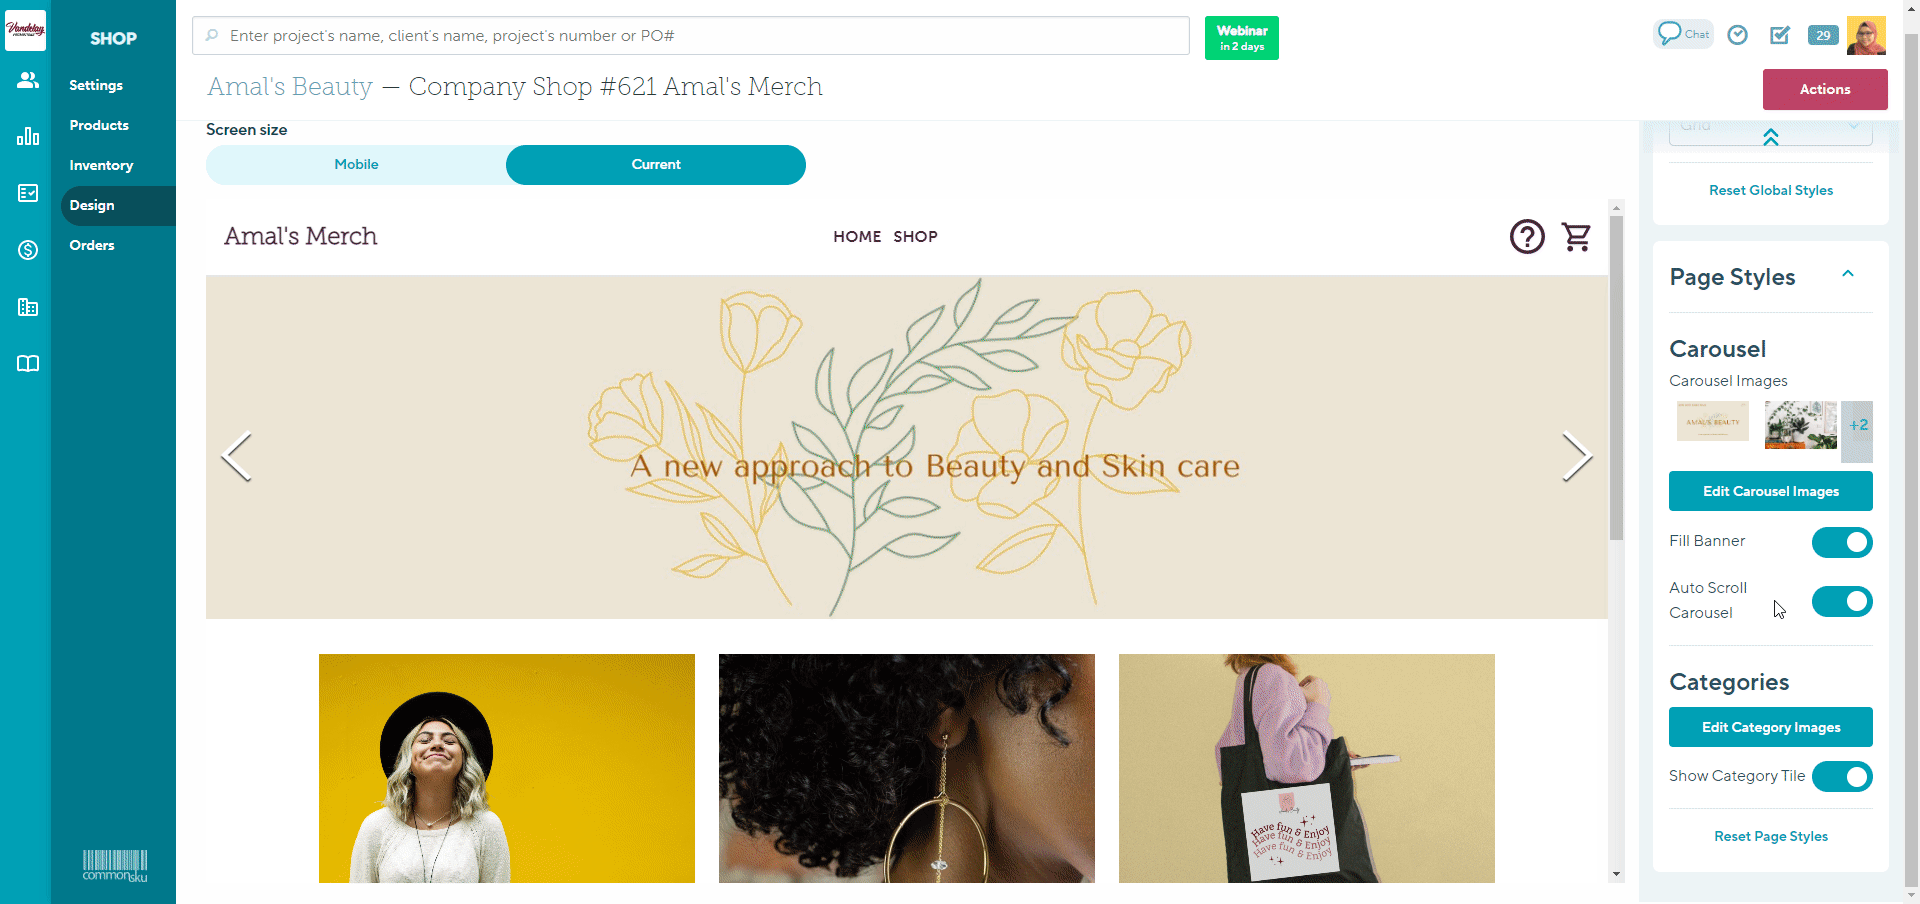
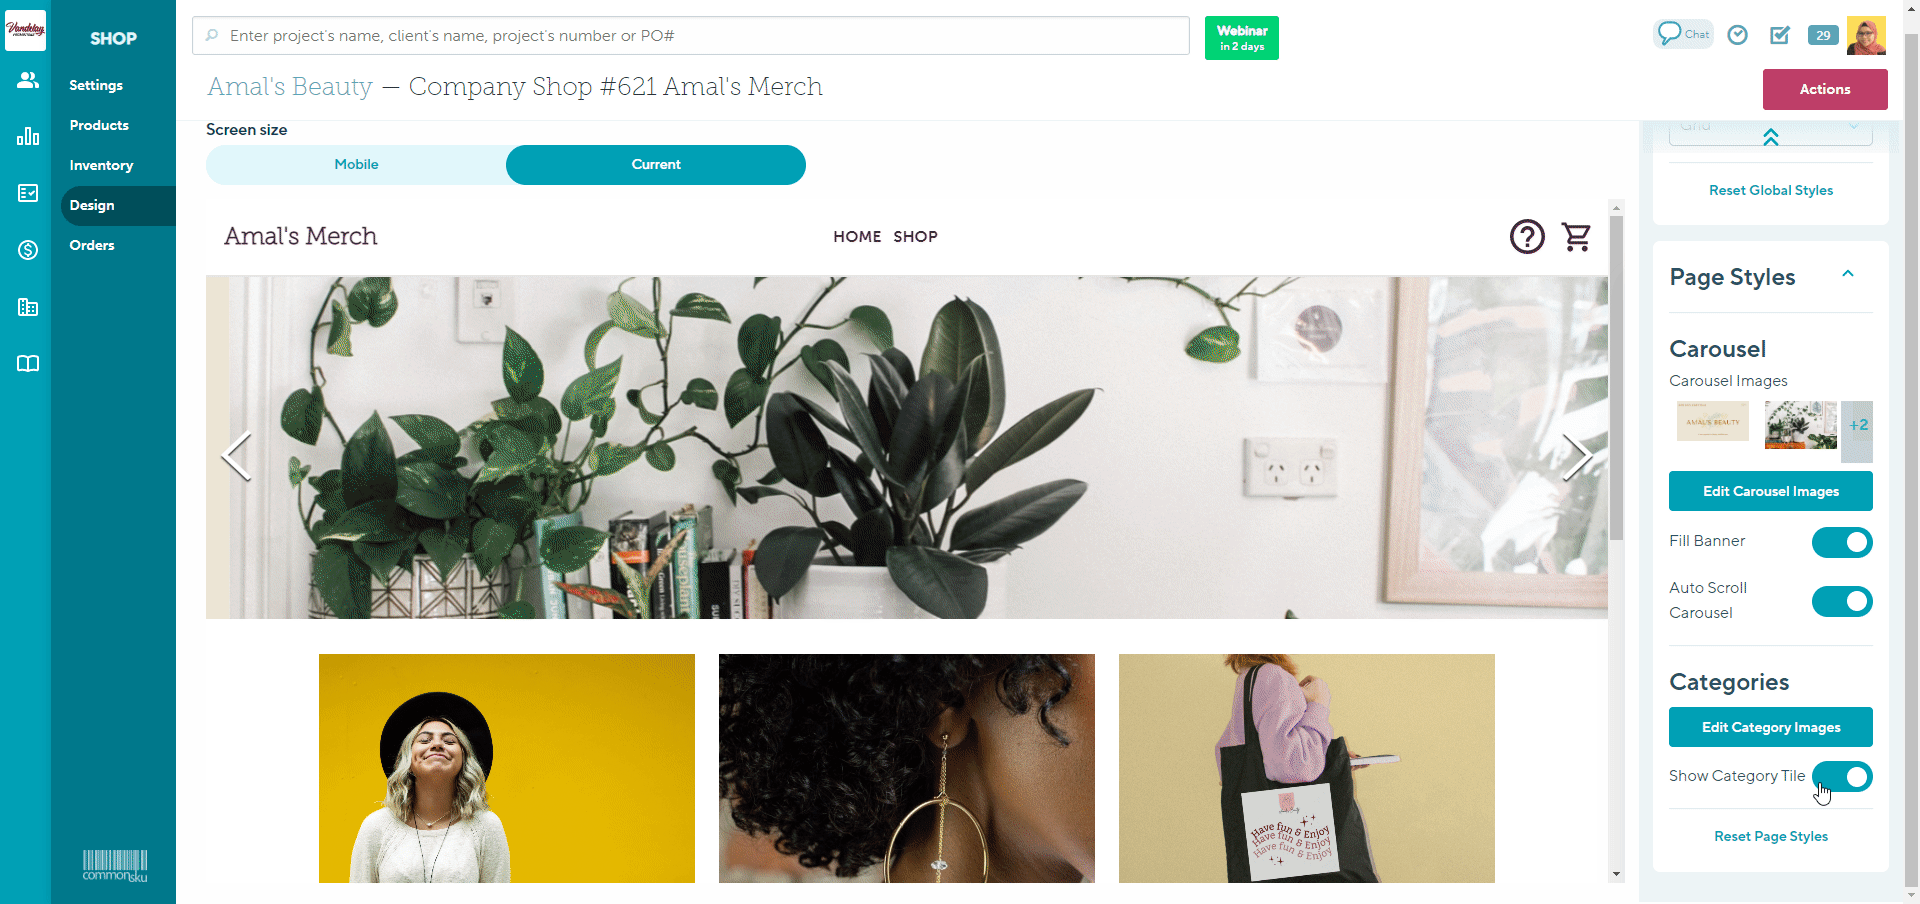
Categories & Carousel
If you're using the Categories & Carousel layout, there are two sections within the Page Styles sections that you need to update:
Carousel
The Carousel tab is where we can update settings including:
Carousel Images
You can upload your own image to use for the landing page of your shop, or use Unsplash.
To upload your own Image:
- Click the Edit Carousel Images button
- Select Upload Image > select the file, or drag and drop the image you need
- Repeat step 2 as needed (optional)
- Drag and drop the Images to rearrange them (optional)
- Click Done
To delete an image:
- Click the Edit Carousel Images button
- Click the red delete button in the right-hand corner of the image
- Click Done

Fill Banner
If you're using the "Fill Banner" option, carousel images should be sized at 1366 x 490 pixels.
If you're not using the "Fill Banner" option, images can be sized at any dimension. We recommend using a rectangular dimension where the image's width is 3.6 x its height (i.e., 1800 x 500 pixels).
If you would like to use the Fill Banner option, click on the Fill Banner radio button to switch it on or off.

Auto Scroll Carousel
This setting will automatically scroll through the carousel images on your shops landing page within the client view. If you do not select this option, your shoppers will be able to click the back-and-forth arrows to scroll through the images manually.
Click on the Auto Scroll Carousel radio to turn the feature on or off.
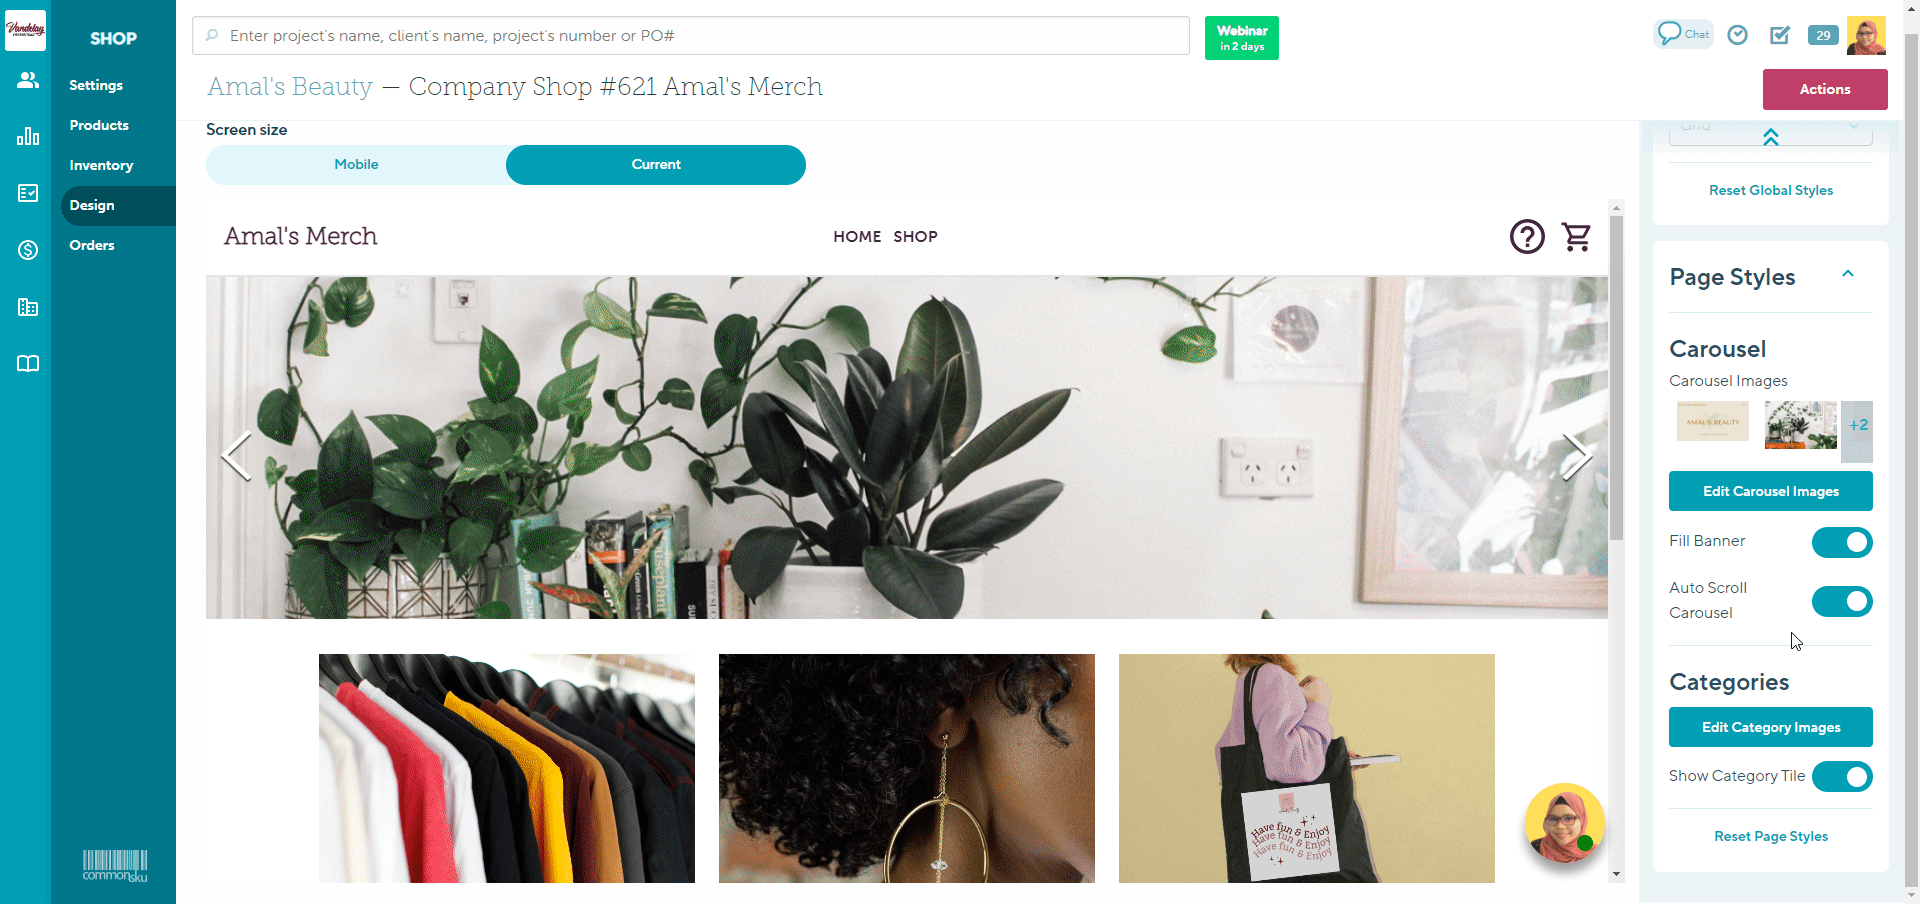
Categories
This Categories tab is where we can update settings including:
Product categories are defined by the products' titles. If you want to categorize the products within your shop, you can add titles to the shop and drag and drop the relevant products into the correct sections.
Category Images
Category images will display on the landing page of the shop to give your clients a preview of what kinds of products will be in their chosen category. You can choose to upload your own image or use Unsplash to customize your Main product Image and Hover Image.
To upload your a Main Image:
- Click on the Edit Category Images button and Select Change Main Image to change the Main category Image.
- Select Upload Image > select the file, or drag and drop the image you need\
- Click Done.
To upload a Hover Image:
- Click on the Edit Category Images button and Select Add/Change Hover Image
- Select Upload Image > select the file, or drag and drop the image you need
- Click Done
Repeat the steps above for all categories.
Select the box next to Use product images for category images in the top left corner to default all category images to product images listed on your products.

A category's Main Image displays when the client is viewing the landing page and the Hover image displays when the client hovers their mouse over the category tile. Main Images are required, but Hover Images are optional and can be deleted.
Category title
You can choose to display or hide category titles on the landing page of the shop for each of your chosen categories.
Click on the radio button toggle to have it switched on or off.
Featured
This layout features a Background Banner image sized at 1300 x 225 pixels and 4 featured products.
This theme allows you to update settings including:
Featured Products
You can choose four products you'd like to feature on the landing page.
To add a product to the landing page:
- Click the Add Featured Product button
- Select choose a featured product > Select Image
- Repeat step 2 to add the other 3 products.
- Click Done.
Banner and Button Text
You can customize the Banner text to change the title on the shop's landing page and the Button text that appears in the "Shop" button.
To customize the Banner and Button text:
1. Click on the Banner or Button text field
2. Enter the text you'd like to use

Background Banner image
You can click Change Image to upload your own image or use Unsplash.
To upload your own Image:
- Click the Change Image button
- Select an image from the options available or click to Upload your own > select the image > then click Open
Poster
This layout features large, page-specific images sized at 1456 x 1007 pixels.
This theme allows you to toggle between the Home and All Products pages of your shop, as well as all Category pages and update their respective settings.
Home
To update the Home page, select Home from the Page dropdown.
Your Home page section is where you can update settings including:
Background Image
You can choose to upload your own image or use Unsplash to customize your shop's landing page.
To upload an Image:
- Click the Background Image box
- Click the Upload tab
- Click Upload Image > select the file, or drag and drop the image you need

Categories
This Categories tab is where we can update settings including:
Product categories are defined by the products' titles. If you want to categorize the products within your shop, you can add titles to the shop and drag and drop the relevant products into the correct sections.
Category Images
Category images will display on the landing page of the shop to give your clients a preview of what kinds of products will be in their chosen category. You can choose to upload your own image or use Unsplash to customize your Main product Image.
To upload your a Main Image:
- Click on the Edit Category Images button and Select Change Main Image to change the Main category Image.
- Select Upload Image > select the file, or drag and drop the image you need
- Click Done.

Repeat the steps above for all categories.
Select the box next to Use product images for category images in the top left corner to default all category images to product images listed on your products.

A category's Main Image displays when the client is viewing the landing page and the Hover image displays when the client hovers their mouse over the category tile. Main Images are required, but Hover Images are optional and can be deleted.
Category title
You can choose to display or hide category titles on the landing page of the shop for each of your chosen categories.
Click on the radio button toggle to have it switched on or off.
-png.png?width=670&height=378&name=Shop-Trade-Show-2023%20(5)-png.png)
All Products
To update the All Products page, select All Products from the Page dropdown.

Your All Products page section is where you can update settings including:
Background Image
You can click Add Image to upload your own image or use Unsplash.
To upload your own Image:
- Click the Change Image button
- Select an image from the options available or click to Upload your own > select the image > then click Open
-png.png?width=670&height=407&name=Shop-Trade-Show-2023%20(7)-png.png)
Dim Banner
If you'd like to dim the background image of the shop's landing page, click on the toggle and drag it from right to left to get the dimness you need.
-png-1.png?width=670&height=407&name=Shop-Trade-Show-2023%20(7)-png-1.png)
Category Pages
To update the settings for a specific Category page, select the relevant category from the Page dropdown.
-png.png?width=670&height=423&name=Shop-Trade-Show-2023%20(8)-png.png)
Your Category page sections are where you can update settings including:
Background Image
You can click Add Image to upload your own image or use Unsplash.
To upload your own Image:
- Click the Change Image button
- Select an image from the options available or click to Upload your own > select the image > then click Open
-png.png)
Dim Banner
If you'd like to dim the background image of the shop's landing page, click on the toggle and drag it from right to left to get the dimness you need.
-png-1.png)
Split
This theme features a split view of the same image. The left-hand side shows the full image, sized at 1007 x 1456 pixels, and the right-hand side shows a zoomed-in version of the image with a color overlay.
This theme allows you to update settings including:
Banner and Button Text
You can customize the Banner text to change the title on the shop's landing page and the Button text that appears in the "Shop" button.
To customize the Banner and Button text:
1. Click on the Banner or Button text field
2. Enter the text you'd like to use

Background image
You can click Change Image to upload your own image or use Unsplash.
To upload your own Image:
- Click the Change Image button
- Select an image from the options available or click to Upload your own > select the image > then click Open

Resetting Page Styles
Click on the Reset Page Styles button > Reset style if you would like to clear the changes made and revert to the default options.

Once you have selected to Reset Styles, you will not be able to Undo the action.
Help Screen Styles
The Help Screen Styles selection allows you to control how your splash screen/help screen appears within your shop.
To turn on the Help Screen:
- Click the Help Screen radio toggle so that it turns dark blue
If you have customized your Splash Screen from the Settings tab in your shop, it will only display to your client if the Help Screen toggle is turned on within your Shop's Design tab.
Help Screen Style
You can choose between two Help Screen Styles:
Text Only
This style displays a pop-up window containing:
- On the left: the text that appears in the Splash Screen section within the Settings tab of your shop
- On the right: the shop contact's name and email address, as entered within the Settings tab of your shop
Side banner
This style displays a pop-up window containing:
- On the left: an uploaded image
- On the right: all details from the splash screen section of your Settings tab, your shop contact's contact information, and a Start Shopping button that directs your shopper to the product list
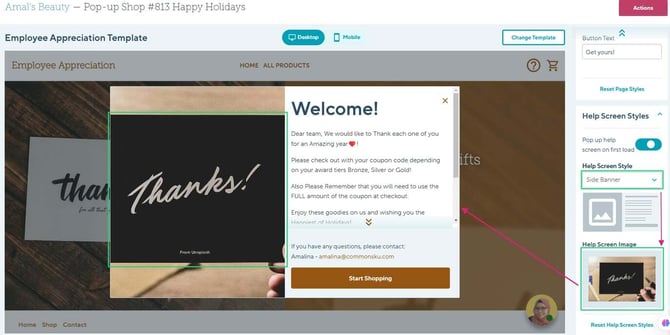
Help Screen Image
You can choose to upload your own image or use Unsplash to customize your shop's splash screen/help screen.
To upload an Image:
- Click the Add Image box
- Click the Upload tab
- Click Upload Image > select the file, or drag and drop the image you need
Resetting Help Screen Styles
Click on the Reset Help Screen Styles button > Reset Styles if you would like to clear the changes made and revert to the default options.
[Back to top]
Unsplash
Unsplash is an image database dedicated to proprietary stock photography. You can source high-resolution images from Unsplash's database to use in the design of your shops.
To upload an image from Unsplash:
- Click the "Theme" drop-down and make your selection
- Click the Unsplash tab
- Type in a keyword to search for images from Unsplash's database > select an image from the options available

FAQ
- Can I skip the landing page and show the products right away?
- Can I embed a shop on a website?
- What file type should I use for the background image?
- Why is the background image not showing correctly?
- Can I create my own personalized shop templates?
- Will saving a new shop template, save my older shop design?
- Why don't I have access to set a template to default, edit or rename templates?
Can I skip the landing page and show the products right away?
There's no way to skip the landing page altogether, but you can remove the text from the shop's splash screen (in the Shop > Settings > Splash screen/ Help) and direct your client straight to the landing page; from there, they can click to start shopping.
Can I embed a shop on a website?
Yes, you can! Copy the shop's URL (in the Shop, click Actions > Preview Shop > copy the URL) and insert it into the website using an iframe. Check with your IT team, or the person who manages the website, if you're unfamiliar with iframes or HTML coding.
What file type should I use for the background image?
Shop's background images should be a JPG, PNG, or PDF file.
Why is the background image not showing correctly?
Images that do not match the required dimensions get distorted or cropped during the upload process and will not be displayed correctly. Make sure your image file matches the theme's required dimensions:
- Billboard - 1456x 1007 pixels
- Featured - 1300 x 225 pixels
- Split - 1007 x 1456 pixels
Can I create my own personalized shop templates?
Yes! The distributor templates allow you to design internally, you can start from a commonsku template or a bare layout, make edits and save the final design as you own personalized company template.
Will saving a new shop template, save my older shop design?
No. If you choose to change a template, please be aware that the system will notify you that any unsaved design changes will be lost. We recommend saving any templates in your Distributor templates if you wish to use in the future, whether for the same shop or for different shops, to avoid losing your work.
Why don't I have access to set a template to default, edit or rename templates?
Only users who have been granted permission to create, modify, and edit templates will have the ability to set a template as default, edit, or rename it. If you find that you do not have access to these features, please reach out to your Admin to request the necessary permissions.